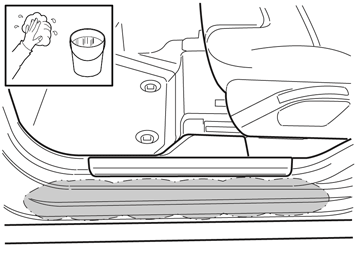
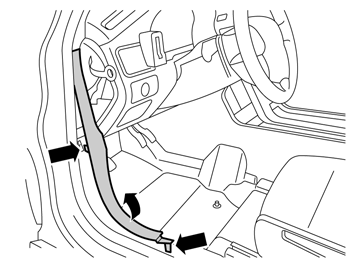
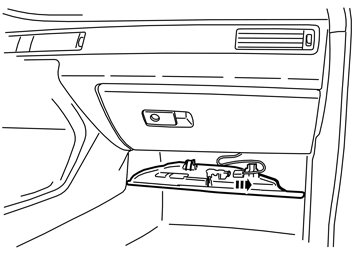
| | Sill mouldings front doors |
|  | | IMG-246024 |
|
| | Sill mouldings front doors Note!
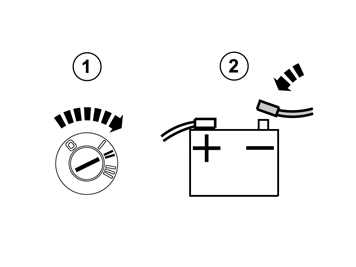
Wait at least three minutes before unplugging the connectors or removing other electrical equipment. |
|
|  | | IMG-297967 |
|
| | |
|  | | IMG-297968 |
|
| | |
|  | | IMG-323263 |
|
| | |
|  | | IMG-323264 |
|
| | |
|  | | IMG-297971 |
|
| | |
|  | | IMG-297972 |
|
| | |
|  | | IMG-255725 |
|
| | |
|  | | IMG-255726 |
|
| | |
|  | | IMG-297973 |
|
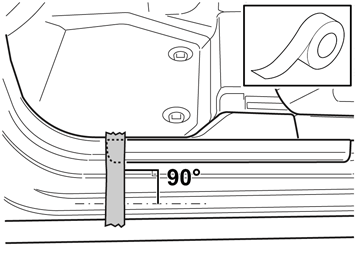
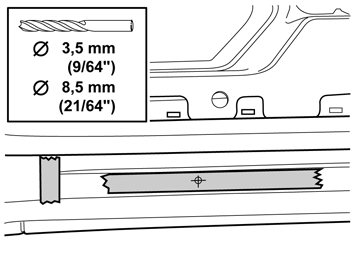
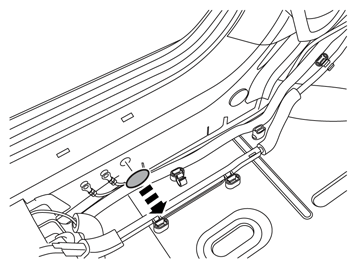
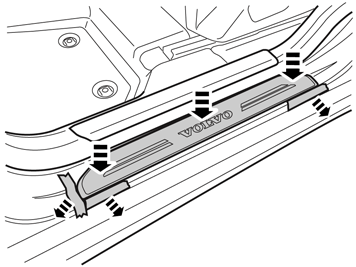
| | Fasten a tape strip on the outer part of the sill, butt with the longitudinal embossing. Measure out 134 mm (5 1/4") from the position where the moulding's front edge should be and mark on the tape strip.
|
|  | | IMG-297975 |
|
| | |
|  | | IMG-298003 |
|
| | |
|  | | IMG-298123 |
|
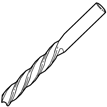
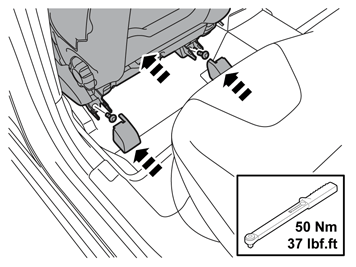
| | Make a light punch mark and pre-drill the hole in the sill with a Ø 3.5 mm (9/64") drill bit. Drill out the hole using a Ø 8.5 mm ( 21/64") drill bit. Remove the tape by the hole, but leave the front one in place. Deburr the edge of the hole, rustproof, and let it dry.
|
|  | | IMG-298585 |
|
| | |
|  | | IMG-266993 |
|
| | |
|  | | IMG-298163 |
|
| | |
|  | | IMG-298164 |
|
| | |
|  | | IMG-298165 |
|
| | |
|  | | IMG-298166 |
|
| | |
|  | | IMG-298167 |
|
| | Continue with previous steps 2-4 on the car's other side during the time that the rustproofing dries. |
|  | | IMG-222265 |
|
|  | | IMG-298168 |
|
| | |
|  | | IMG-231432 |
|
| | |
|  | | IMG-222267 |
|
| | |
|  | | IMG-231433 |
|
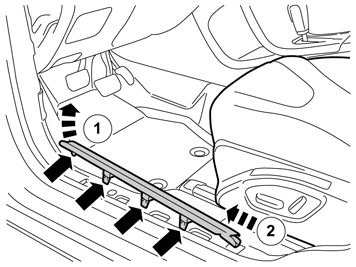
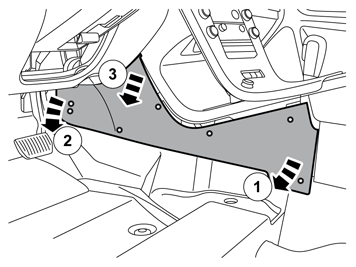
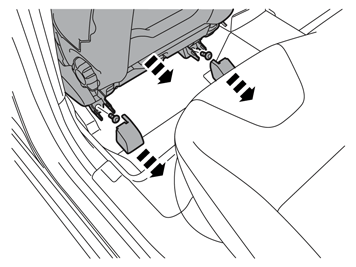
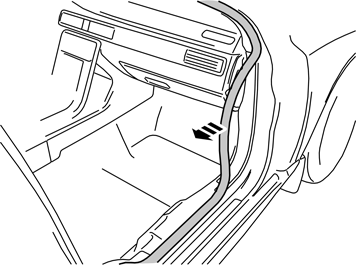
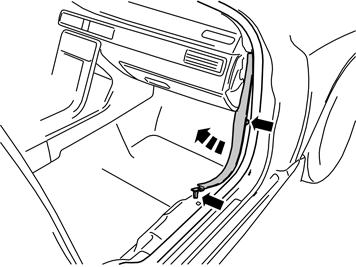
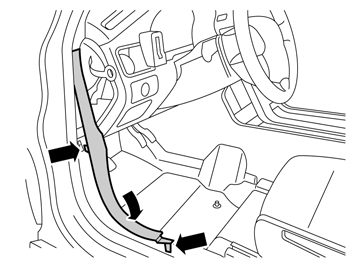
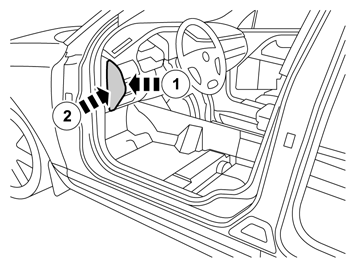
| | Remove the lower A-pillar panel by the right front door by first pulling it up at the rear edge until the clip there releases. Then pull it back further until the clip on the centre releases. Then pull it away diagonally down from the upper A-pillar panel. Continue with previous steps 10-13.
|
|  | | IMG-303343 |
|
| | |
|  | | IMG-222268 |
|
|  | | IMG-222270 |
|
| | |
|  | | IMG-298169 |
|
| | |
|  | | IMG-298183 |
|
| | Note!
Same on left-hand drive and right-hand drive cars. |
|
|  | | IMG-298203 |
|
| | |
|  | | IMG-298204 |
|
|  | | IMG-298205 |
|
| | Note!
Carry out on both sides of the car. |
|
|  | | IMG-298206 |
|
| | |
|  | | IMG-298207 |
|
| | |
|  | | IMG-290343 |
|
| | |
|  | | IMG-298364 |
|
| | Note!
Avoid damaging the rustproofing in the hole's edge. |
|
|  | | IMG-298363 |
|
| | |
|  | | IMG-298365 |
|
| | |
|  | | IMG-290346 |
|
| | |
|  | | IMG-290347 |
|
| | Note!
Do not push down the strip too close to the protective tape on the inner tape. Then the strip is almost up against the sill and can catch, causing the tape to break. |
|
|  | | IMG-290348 |
|
| | |
|  | | IMG-298369 |
|
| | |
|  | | IMG-298370 |
|
| | |
|  | | IMG-298371 |
|
| | |
|  | | IMG-298372 |
|
| | |
|  | | IMG-317165 |
|
| | |
|  | | IMG-298374 |
|
|  | | IMG-298375 |
|
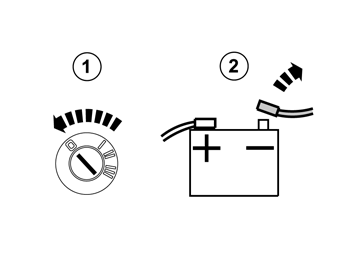
| | A Get a loose connector from the kit and press in the cable terminals on the two wire ends on the sill moulding, wire with red (R) marking in position 1, the other in position 2, until a click is heard.
B |
|  | | IMG-298483 |
|
| | Note!
Same on left-hand drive and right-hand drive cars |
|
|  | | IMG-298484 |
|
| | Note!
Same on left-hand drive and right-hand drive cars. |
|
|  | | IMG-298485 |
|
| | |
|  | | IMG-298486 |
|
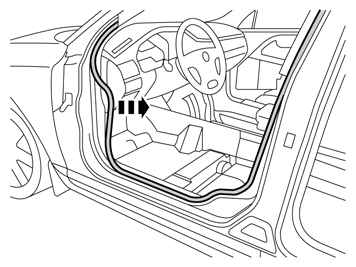
| | Pull up the cable harness from the transformer along the existing wires up under the dashboard, along the collision pipe and on to the lighting under the dashboard. Secure the cable harness at the thin cable harness using cable ties from the kit, however, do not tighten them yet, adjust the length up to the lighting in the panel.
Note!
Do not clamp the washer hose, and ensure that the cable harness is clamped so that is does not chafe against sharp edges under the dashboard. |
|
|  | | IMG-317166 |
|
| | Connect the prewired cable harnesses female connector to the courtesy lighting. Connect the two remaining connectors to each other. Now adjust the cable length up to the transformer and tighten the two cable ties.
|
|  | | IMG-298489 |
|
| | |
|  | | IMG-298503 |
|
| | Install the transformer on the right side and plug in connector according to steps 42-47. Route the long adapter wire to the door sill with existing cable harnesses. Pull up the adapter wire along the cable harnesses up to upper edge of the contact bridge. Clamp down to cable harnesses with cable ties from the kit.
|
|  | | IMG-298523 |
|
| | |
|  | | IMG-298524 |
|
| | |
|  | | IMG-298525 |
|
|  | | IMG-225272 |
|
| | |
|  | | IMG-231438 |
|
| | |
|  | | IMG-225281 |
|
| | |
|  | | IMG-231437 |
|
| | |
|  | | IMG-298526 |
|
|  | | IMG-225282 |
|
| | A Note!
Applies to cars with switch for passenger airbag. |
|
|  | | IMG-298583 |
|
| | |
|  | | IMG-298584 |
|
| | |
|  | | IMG-298586 |
|
| | |
|  | | IMG-298587 |
|
| | |
|  | | IMG-298588 |
|
| | |
|  | | IMG-255785 |
|
| | |
|  | | IMG-255786 |
|
| | |
|  | | IMG-255787 |
|
| | |
|  | | IMG-255788 |
|
| | |
|  | | IMG-242267 |
|
| | |
| | Sill mouldings rear doors |
|  | | IMG-297874 |
|
| | Sill mouldings rear doors |
|  | | IMG-290349 |
|
| | |
| | | IMG-290343 |
|
| | Position the sill moulding by the strip of tape at the front edge and position it so that the cut-outs in both ends align with the corresponding door sill. Be careful when positioning so that the moulding is not misaligned. Attach a strip of tape to mark the sideways position.
|
|  | | IMG-290344 |
|
| | |
|  | | IMG-300145 |
|
| | |
|  | | IMG-290403 |
|
| | |
|  | | IMG-290404 |
|
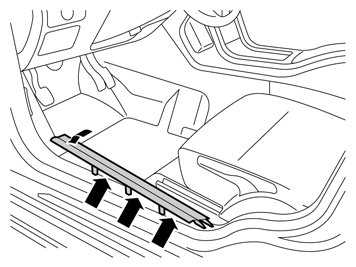
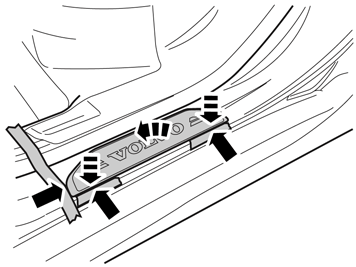
| | Now press along the entire strip so that it fastens properly. Press the moulding strip down firmly with a pressure of 2 kg/cm² along its entire length. Repeat the operation on the other side.
|