| | |
| | Read through all of the instructions before starting installation. Notifications and warning texts are for your safety and to minimise the risk of something breaking during installation. Ensure that all tools stated in the instructions are available before starting installation. Certain steps in the instructions are only presented in the form of images. Explanatory text is also given for more complicated steps. In the event of any problems with the instructions or the accessory, contact your local Volvo dealer.
|
| | |
| | When installing, the car must retain a temperature of 20 degrees C. There may be parts in the accessories kit that are not needed for this installation. |
| | |
|  | | IMG-363036 |
|
| | Note!
This colour chart displays (in colour print and electronic version) the importance of the different colours used in the images of the method steps. |
Used for focused component, the component with which you will do something. Used as extra colors when you need to show or differentiate additional parts. Used for attachments that are to be removed/installed. May be screws, clips, connectors, etc. Used when the component is not fully removed from the vehicle but only hung to the side. Used for standard tools and special tools. Used as background color for vehicle components.
|
| | |
| | Applies to model S60 Cross Country |
|  | | IMG-409806 |
|
| | Note!
The graphic shows the back of the component before removal. |
|
| | Applies to model V60 Cross Country |
|  | | IMG-408840 |
|
| | Note!
The graphic shows the back of the component before removal. |
|
| | |
|  | | IMG-408815 |
|
| | Note!
Make sure to follow the sequence indicated. |
Remove the part carefully Repeat on the other side. |
|  | | IMG-408830 |
|
| | Remove the marked part. Repeat on the other side. |
| | Applies to model S60 Cross Country |
|  | | IMG-409795 |
|
| | Caution!
Make sure that the surface is clean and free of foreign material. |
Remove any traces of glue. Use hands only. Use: Interior trim remover
Use: Hot-air gun
Use: , Isopropanol
|
| | |
|  | | IMG-371600 |
|
| | |
|  | | IMG-337278 |
|
| | Remove the screws. Repeat on the other side. |
| | Applies to model S60 Cross Country |
|  | | IMG-340010 |
|
| | |
|  | | IMG-340641 |
|
| | Remove the part carefully Repeat on the other side. |
|  | | IMG-340643 |
|
| | Request the aid of a colleague for this procedure. Remove the marked part. |
|  | | IMG-346370 |
|
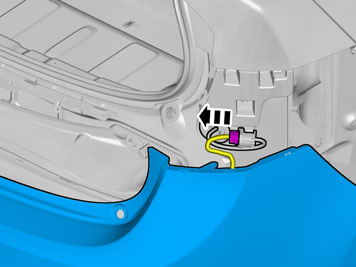
| | Caution!
Place the Bumper Cover on a suitable surface. |
Disconnect the connector, if applicable. |
| | Applies to model V60 Cross Country |
|  | | IMG-351651 |
|
| | |
|  | | IMG-347593 |
|
| | |
|  | | IMG-377896 |
|
| | Remove the part carefully Repeat on the other side. |
|  | | IMG-377891 |
|
| | Request the aid of a colleague for this procedure. Remove the marked part. |
|  | | IMG-346370 |
|
| | Caution!
Place the Bumper Cover on a suitable surface. |
Disconnect the connector, if applicable. |
| | |
|  | | IMG-337283 |
|
| | Caution!
The part is to be reused. |
Note!
The screws are to be reused. |
|
|  | | IMG-337281 |
|
| | |
|  | | IMG-337285 |
|
| | |
|  | | IMG-337286 |
|
| | |
|  | | IMG-337287 |
|
| | |
|  | | IMG-337288 |
|
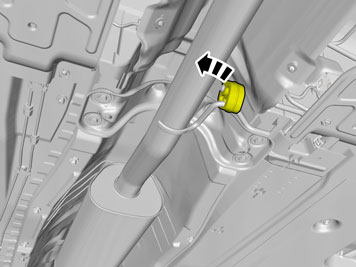
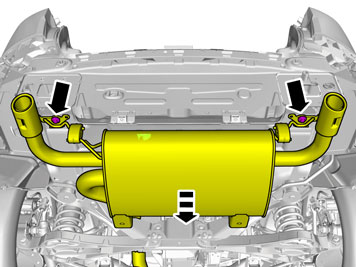
| | Caution!
Make sure that the exhaust flexible pipe is not forcibly bent or twisted. |
|
|  | | IMG-374625 |
|
| | |
|  | | IMG-337290 |
|
| | |
|  | | IMG-337291 |
|
| | |
|  | | IMG-337292 |
|
| | Remove the marked part. Repeat on the other side. |
|  | | IMG-337293 |
|
| | Scrape off all sealant from the flat surface. Clean the surface. Repeat on the other side. |
| | |
|  | | IMG-338051 |
|
| | Install component that comes with the accessory kit. |
|  | | IMG-355355 |
|
| | |
|  | | IMG-355356 |
|
| | Caution!
Make sure that the exhaust flexible pipe is not forcibly bent or twisted. |
Note!
Only tighten the nut finger tight at this stage. |
Install the screws. Repeat on the other side.
Use special tool: T9995972, FIXTURE (UNIVERSAL/TRANSAXLES)
Use special tool: T9985972, JACK (HYDRAULIC)
|
|  | | IMG-371531 |
|
| | Repeat on the other side. |
|  | | IMG-371532 |
|
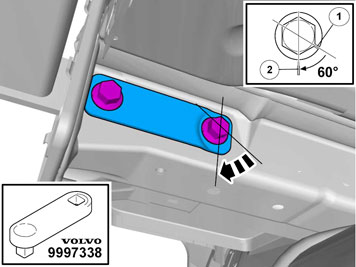
| | Repeat on the other side.
Use special tool: T9997338, Extension rod
|
| | |
|  | | IMG-374624 |
|
| | |
|  | | IMG-374625 |
|
| | |
|  | | IMG-338056 |
|
| | |
|  | | IMG-337297 |
|
| | |
|  | | IMG-337298 |
|
| | |
|  | | IMG-337299 |
|
| | |
|  | | IMG-400960 |
|
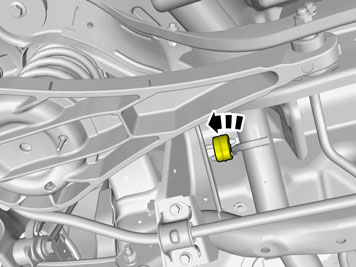
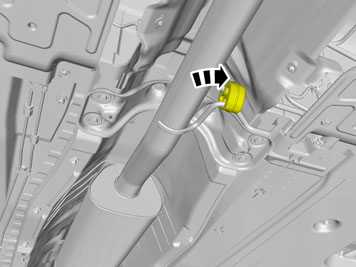
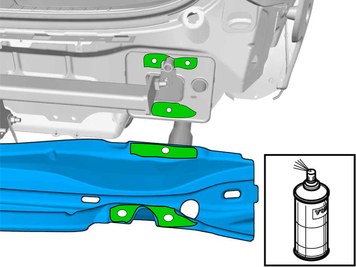
| | Use: , Rust inhibitor, low viscosity
Repeat on the other side. |
|  | | IMG-337977 |
|
| | |
| | |
|  | | IMG-376815 |
|
| | |
|  | | IMG-376820 |
|
| | Apply tape to the other side, opposite the marking lines. |
|  | | IMG-376804 |
|
| | Caution!
Take extra care not to damage the wiring harnesses. |
|
|  | | IMG-377003 |
|
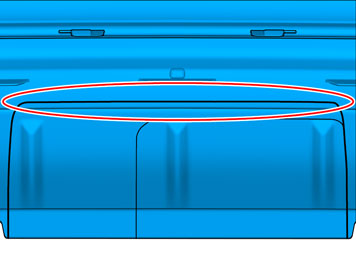
| | Note!
Do not use the uppermost line of the actual markings. |
|
|  | | IMG-376938 |
|
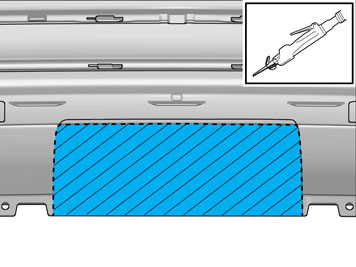
| | Note!
Saw in the radius between the existing marking lines. |
|
|  | | IMG-376948 |
|
| | |
|  | | IMG-376818 |
|
| | |
| | |
|  | | IMG-346526 |
|
| | Place the Bumper Cover in position for installation. Connect the connector, if applicable. |
|  | | IMG-377070 |
|
| | Reinstall the removed parts in reverse order. |
| | Applies to model S60 Cross Country |
|  | | IMG-409800 |
|
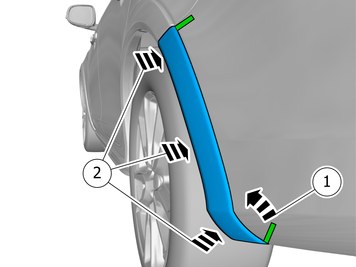
| | Install component that comes with the accessory kit. Ensure that all clips engage. Repeat on the other side. |
|  | | IMG-409801 |
|
| | Remove the protective film.
Hint
Press and apply pressure to the part over the tape for at least 20 seconds. |
Repeat on the other side. |
| | Applies to model V60 Cross Country |
|  | | IMG-409800 |
|
| | Reinstall the removed part. Ensure that all clips engage. Repeat on the other side. |
| | |
|  | | IMG-342317 |
|
| | |
| | Vehicles without spare wheel |
|  | | IMG-342227 |
|
| | |
| | Vehicles with spare wheel |
|  | | IMG-399470 |
|
| | Remove the screw. Remove the marked part. |
|  | | IMG-399471 |
|
| | |
| | |
|  | | IMG-340272 |
|
| | Install component that comes with the accessory kit. |
|  | | IMG-338586 |
|
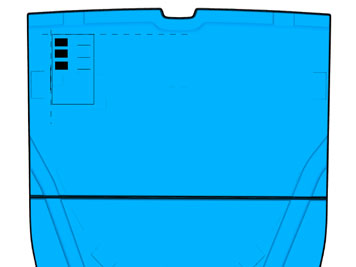
| | Take the label from the kit and attach it to the underneath of the cargo compartment mat as illustrated. Attach the four corners of the label using staples. |
|  | | IMG-338587 |
|
| | Take the label from the kit and attach it to the underneath of the cargo compartment mat as illustrated. Attach the four corners of the label using staples. |
|  | | IMG-338588 |
|
| | |
|  | | IMG-338589 |
|
| | |
|  | | IMG-372330 |
|
| | Install component that comes with the accessory kit. |
|  | | IMG-372215 |
|
| | Install component that comes with the accessory kit. |
|  | | IMG-372217 |
|
| | |
|  | | IMG-377070 |
|
| | Reinstall the removed parts in reverse order. |