2013 L.H.D

安装说明

Installation instructions, accessories
Volvo Car Corporation Gothenburg, Sweden
V60 2013
V60 (-18) 2013

Instruction NoVersionPart. No.Click to download PDF-version of this Installation Instruction
312656291.131316074, 31316485, 31316484, 31265626, 31316075
Skid plate, front bumper


IMG-339291


Equipment
A0000162
IMG-239660
IMG-239681
A0000177
A0000214
M0000232

IMG-339292


INTRODUCTION

  • Read through all of the instructions before starting installation.

  • Notifications and warning texts are for your safety and to minimise the risk of something breaking during installation.

  • Ensure that all tools stated in the instructions are available before starting installation.

  • Certain steps in the instructions are only presented in the form of images. Explanatory text is also given for more complicated steps.

  • In the event of any problems with the instructions or the accessory, contact your local Volvo dealer.


Note!

Carry out the work at a temperature of at least 20 °C (68 °F).

Do not use the vehicle within 2 hours after doing the work.

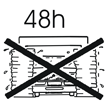
Do not wash the vehicle within 48 hours after doing the work.


1
IMG-339288
 

  • Wash the surfaces of the car that are to be covered by the skid plate.

  • Wipe dry.

2
IMG-339289
 

  • Remove the screws and place to one side. New ones can be found in the kit.

3
IMG-339290
 

Get help from a colleague for marking.

  • Place the skid plate in position as illustrated.

  • Press it from underneath and from the front towards the body as shown by the arrows.

  • Mark out the positions of the sides using pieces of tape.

  • Remove the skid plate.

4
IMG-339275
 

  • Take the drilling templates from the kit and press the drilling templates into the holes in the skid plate on both sides.

5
IMG-339274
 

  • Remove the backing tape from both templates.

6
IMG-339287
 

  • Centre the skid plate according to the markings made and press it so that the drilling templates secure on the inside.

7
IMG-339280
 

  • Remove the skid plate from the grille.

  • Remove the tape markings.

8
IMG-339279
 

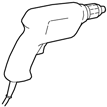
  • Drill out the holes through the taped drilling templates.

9
IMG-339266
 

  • Remove the drilling templates and tape residue on both sides.

10
IMG-339276
 

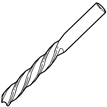
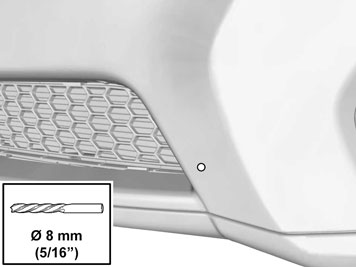
  • Drill the holes to Ø 8 mm (5/16 ").

  • Remove the swarf and smooth off the hole edges.

11
IMG-339281
 

  • Clean using isopropanol where the tape on the skid plate was secured. Wipe dry.

12
IMG-339282
 

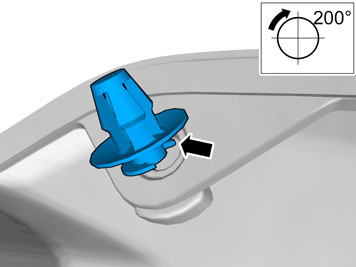
  • Take the clip from the kit and take out the skid plate again.

  • Insert one spike on the clip under the edge of the hole in the skid plate, turn anticlockwise and at the same time press until the clip is in place.

  • Repeat the operation on the other side.

13
IMG-339283
 

  • Fold out the protective tape tabs on both sides.

14
IMG-339293


Note!

Ensure that the protective tap tabs are folded out on the front of the skid plate


  • Position the skid plate at the lower grille push towards the bumper cover until the two clips engage.

15
IMG-339273
 

  • Carefully pull off the protective tape around both sides in the sequence shown, and secure each time.

16
IMG-339284
 

  • Now press the skid plate into place opposite the tape all the way around.

17
IMG-339285
 

  • Tighten the skid plate below using screws from the kit. Start in the centre and work towards the sides.