| | |
|  | | IMG-214981 |
|
| | |
|  | | IMG-250925 |
|
| | |
|  | | IMG-250926 |
|
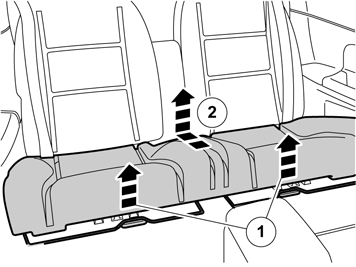
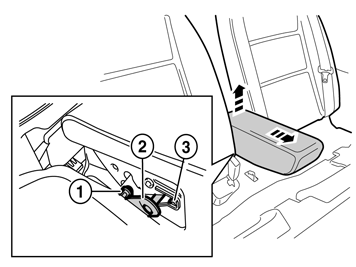
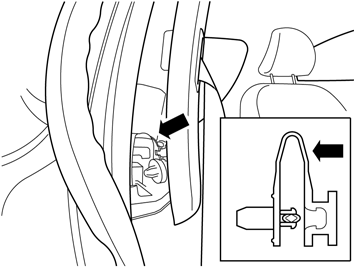
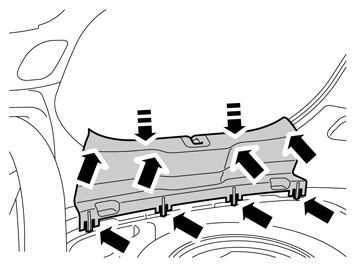
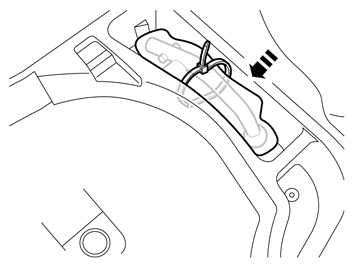
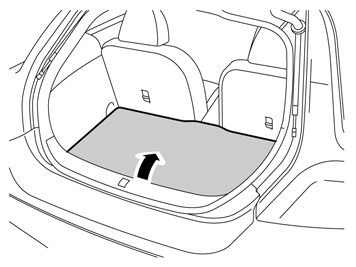
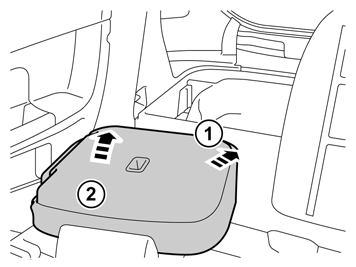
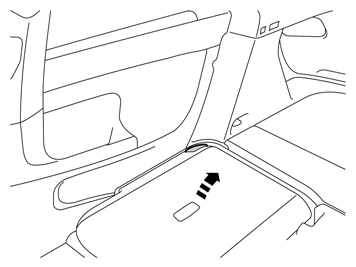
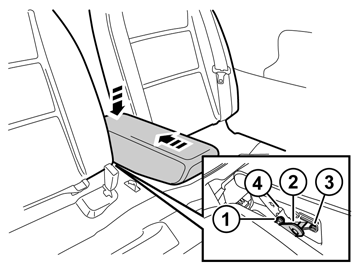
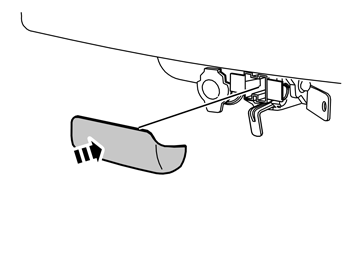
| | Fold the central arm rest forward. Remove the central arm rest by grasping each end and pulling upwards until it releases at the rear edge from the backrest's lugs (1). Then pull forwards until the holders (2) on the sides of the backrest have slid out of the corresponding cut-out (3) in the central arm rest.
|
|  | | IMG-250927 |
|
| | |
|  | | IMG-250928 |
|
| | |
|  | | IMG-250929 |
|
| | |
|  | | IMG-250930 |
|
| | |
|  | | IMG-251368 |
|
|  | | IMG-251369 |
|
| | |
|  | | IMG-251370 |
|
| | |
|  | | IMG-240957 |
|
| | |
|  | | IMG-241183 |
|
| | |
|  | | IMG-241184 |
|
| | |
|  | | IMG-277604 |
|
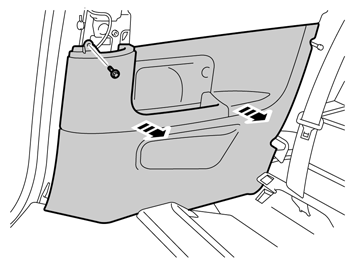
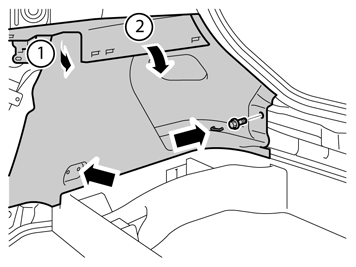
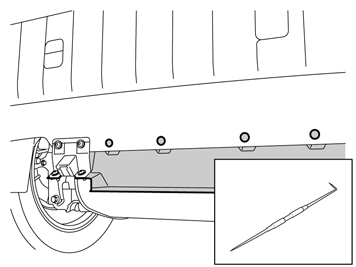
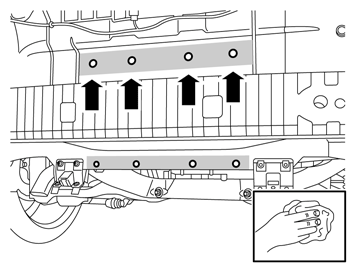
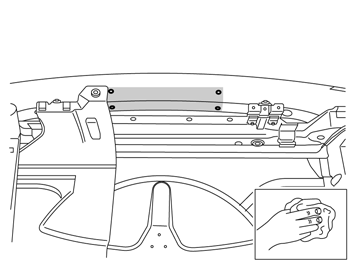
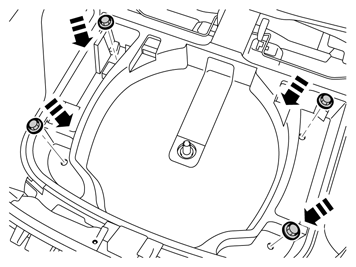
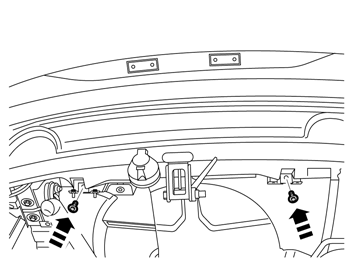
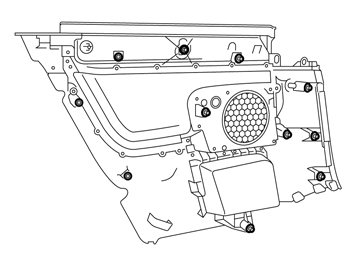
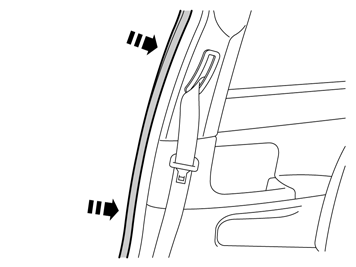
| | Remove the clips at the rear edge of the right-hand rear side panel. Carefully pull the side panel off, starting at the front edge/upper edge and then straight back until all clips at the top edge have released. Fold the panel inwards. Release it from the anchorage eyelets and lift it out of the load floor support.
|
|  | | IMG-241200 |
|
| | |
|  | | IMG-240960 |
|
|  | | IMG-279284 |
|
| | |
|  | | IMG-240963 |
|
| | |
|  | | IMG-240964 |
|
| | |
|  | | IMG-277903 |
|
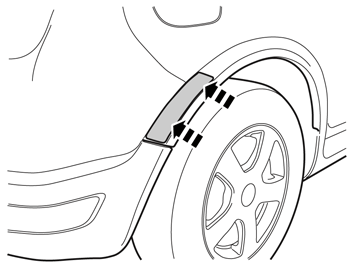
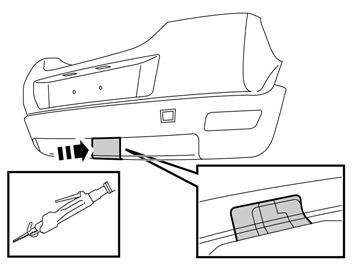
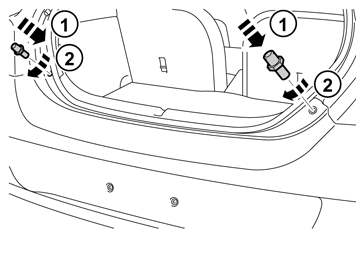
| | Attach a piece of tape to the wing extender's rear section to protect it when removing the bumper cover at the front edge. The tape must be positioned so as not to leave any marks when prying the bumper loose. Carry out the procedure on both sides of the car.
|
|  | | IMG-240972 |
|
|  | | IMG-240974 |
|
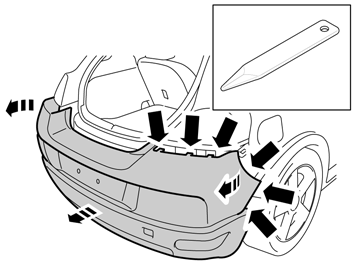
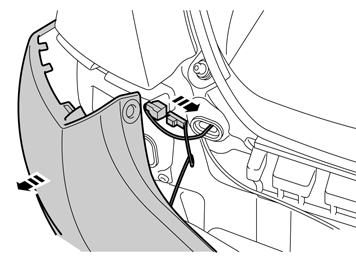
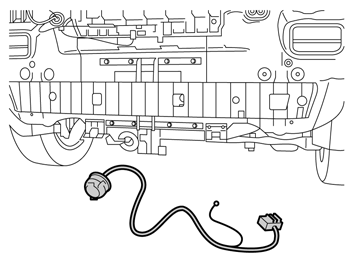
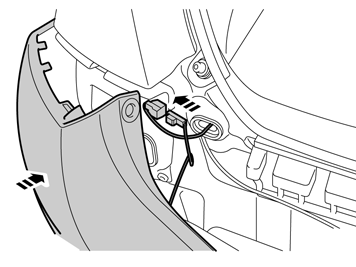
| | Illustration A Illustration B Disconnect the connector for the license plate lighting, on the left-hand side. If the car has rear parking assistance, disconnect the connector on the right-hand side. Remove the pieces of tape.
|
| | |
|  | | IMG-241202 |
|
| | Steps 20-23 apply to cars with a 4-cylinder engine |
|  | | IMG-241203 |
|
| | |
|  | | IMG-241204 |
|
| | |
|  | | IMG-241205 |
|
| | |
| | |
|  | | IMG-241206 |
|
| | Steps 24-29 apply to cars with a 5-cylinder engine |
|  | | IMG-241207 |
|
| | |
|  | | IMG-241208 |
|
| | |
|  | | IMG-241210 |
|
| | |
|  | | IMG-241211 |
|
| | |
|  | | IMG-241213 |
|
| | |
| | |
|  | | IMG-275523 |
|
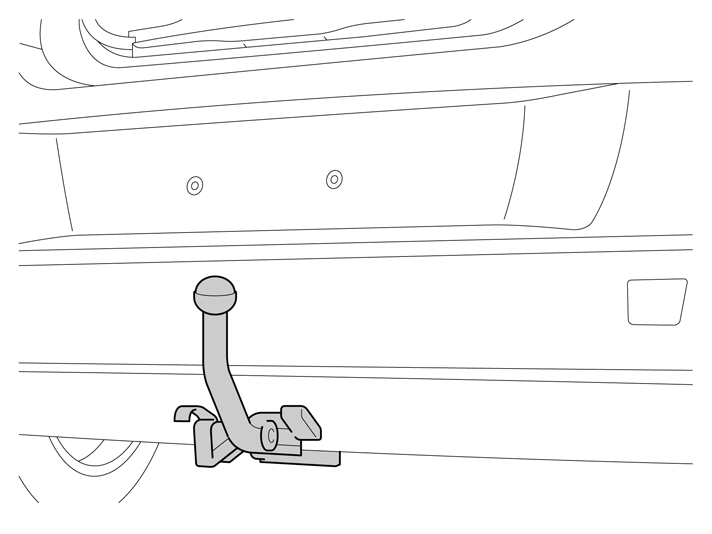
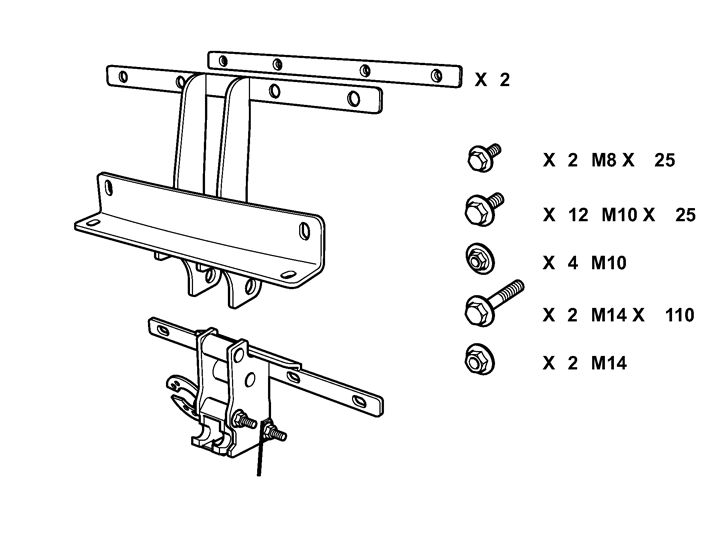
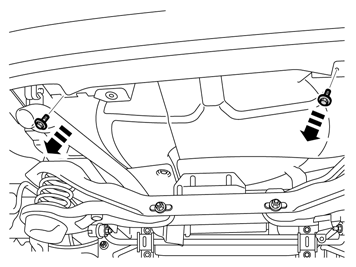
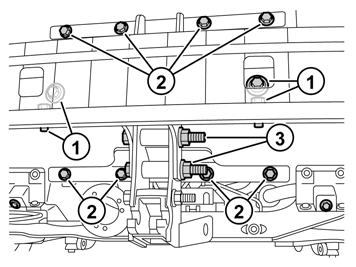
| | Installing the tow hitch Remove the four rubber plugs. Clean any dirt, remaining bodywork sealant or splashes of underbody sealant from the marked surfaces for the tow hitch mounting to the body panel on the inside and outside.
|
|  | | IMG-241217 |
|
| | |
|  | | IMG-277904 |
|
| | |
|  | | IMG-277603 |
|
|  | | IMG-241221 |
|
|  | | IMG-277905 |
|
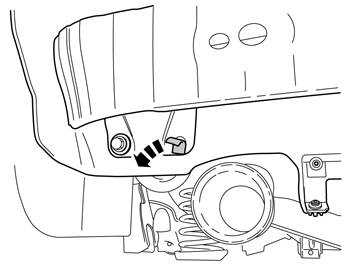
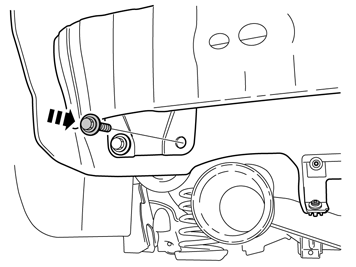
| | Illustrations A, B and C Take the mounting plate equipped with welding nuts and four flange screws M10x25 from the kit. Lift the cargo compartment floor and upwards at the right-hand corner. Install the mounting plate with the screws.
Note!
Check that the mounting plate ends up on the right-hand side of the cable harness (1). |
Do not tighten fully yet.
|
| | |
|  | | IMG-249046 |
|
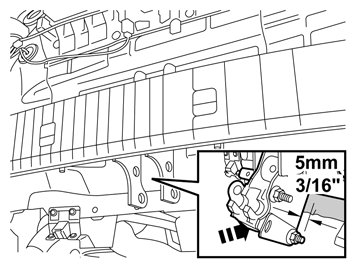
| | Steps 34-35 apply to cars with a 5-cylinder engine Hook the holder with tow ball on the installed L-profile for marking and cutting out the radiated heat shield. On the radiated heat shield, mark an extra 5 mm (3/16") on each side of the holder.
|
|  | | IMG-241224 |
|
| | |
|  | | IMG-246787 |
|
| | Applies to all models Take the holder with mounting for the two ball, two flange screws M14x110 and two flange nuts. Install the holder on the L-profile.
Note!
Do not tighten fully yet. |
Take four flange screws, M10x25, and the mounting plate with welding nuts. Install the mounting plate on the front side of the plate flange, at the lower edge of the body. Install the screws.
Note!
Do not tighten fully yet. |
|
|  | | IMG-246788 |
|
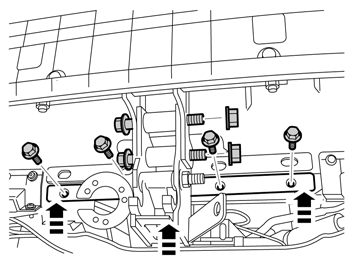
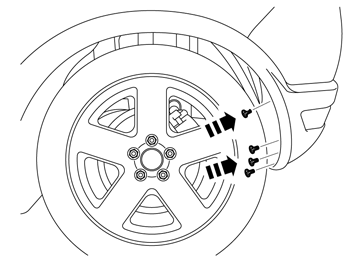
| | Tighten the four M10 screws (1) alternately on the L-profile, so that the L-profile lies firmly against both sides of the collision member. Tighten the four screws. Tighten to 47 Nm (35 lbf.ft.). Tighten the eight M10 screws (2) in the plate flange, at the lower edge and upper edge of the body, and torque tighten them to 47 Nm (35 lbf.ft.). Tighten the two M14 screws (3) through the spacer pipes and torque tighten to 200 Nm (147 lbf.ft.).
|
|  | | IMG-256243 |
|
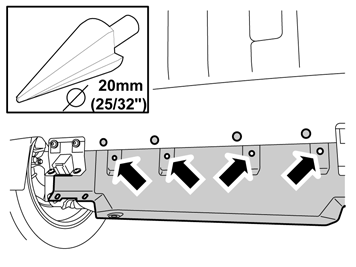
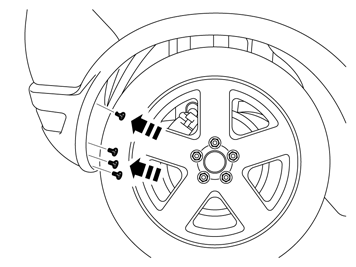
| | Applies to cars that do not have inner lower screws in the collision member Remove any tape that covers the holes for the screw on the collision member's both sides. Make sure that the metal surface is clean where the screw is to be tightened.
|
|  | | IMG-256244 |
|
| | |
|  | | IMG-246789 |
|
| | |
| | |
|  | | IMG-246790 |
|
|  | | IMG-246791 |
|
| | Finishing work Illustration A Illustration B |
|  | | IMG-241324 |
|
| | |
|  | | IMG-277605 |
|
| | |
|  | | IMG-241379 |
|
| | |
|  | | IMG-241378 |
|
| | |
|  | | IMG-246792 |
|
| | Hint
If the towbar is to be inspected at the workshop you can wait with this procedure until everything is done. |
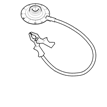
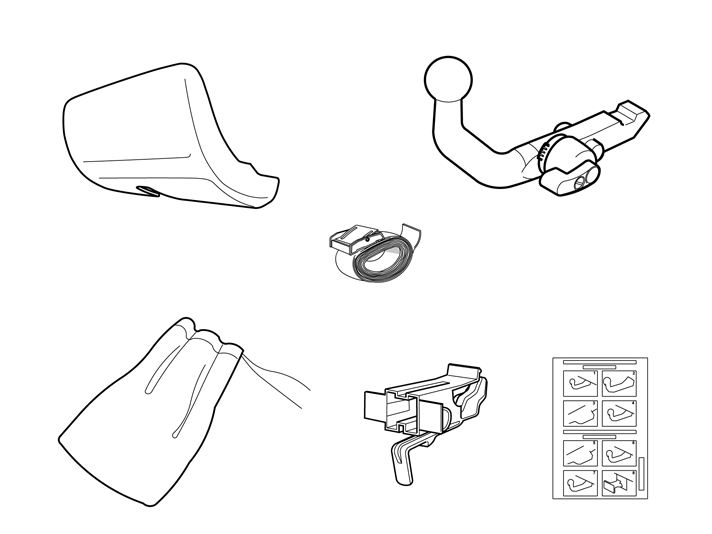
Remove the bag from the kit, put the towbar inside and tie it up. Place it on the right-hand side in the load floor support. Take the strap and tighten the bag and towbar to the load floor support. Tighten the straps twice around the tow bar and bag.
|
|  | | IMG-249351 |
|
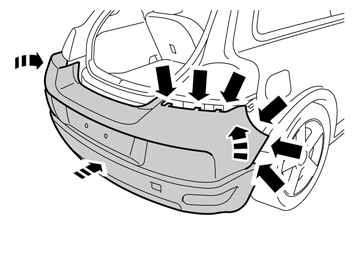
| | Apply tape to the outside of the bumper cover, opposite the markings on the inside and right up to the first joint line on the lower section of the bumper cover. This is in order to protect the paintwork from the base of the saw when sawing out the cut-out for the towbar. Saw out the slot acc. to the raised marking.
Note!
Do not damage the painted surface of the bumper cover. Cut so that the raised edge on the inside remains. The raised edge marks the cut-out. |
Smooth off the sawn edges with a fine toothed file. Remove the masking tape.
This step also applies to cars equipped with body kit. |
|  | | IMG-241381 |
|
|  | | IMG-246793 |
|
| | |
|  | | IMG-246794 |
|
| | |
|  | | IMG-241386 |
|
| | |
|  | | IMG-279323 |
|
|  | | IMG-241384 |
|
| | |
|  | | IMG-246795 |
|
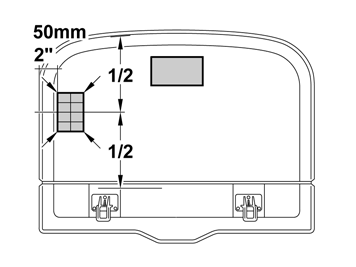
| | Take the label from the kit and affix it firmly to the underside of the cargo compartment carpet as illustrated. In addition, use staples in the four corners of the labels.
|
|  | | IMG-246796 |
|
| | |
|  | | IMG-251430 |
|
|  | | IMG-251431 |
|
| | Illustration A Illustration B |
|  | | IMG-251432 |
|
| | |
|  | | IMG-261489 |
|
| | |
|  | | IMG-261490 |
|
| | |
|  | | IMG-261491 |
|
| | |
|  | | IMG-261492 |
|
| | |
|  | | IMG-261493 |
|
| | |
|  | | IMG-246644 |
|
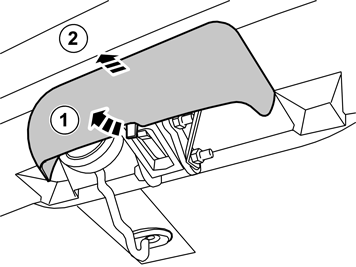
| | Reinstall the central arm rest by grasping each end, moving it up towards the backrest lugs (1) and aligning the holders (2) in the backrest's sides in the central arm rest's cut-out (3). Then press the central arm rest down at the rear edge so that the lugs (1) engage in the cut-out (4). A click should be heard when the central arm rest is secured.
|
|  | | IMG-241377 |
|
| | |
| | |
|  | | IMG-226909 |
|
| | |
|  | | IMG-227105 |
|
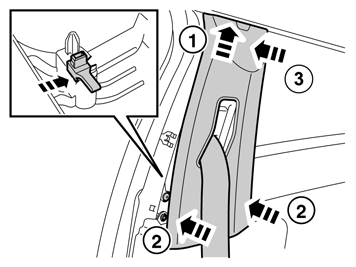
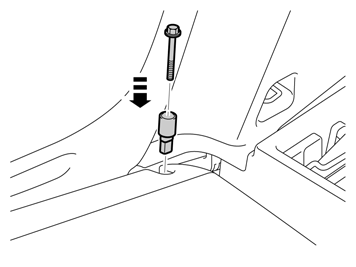
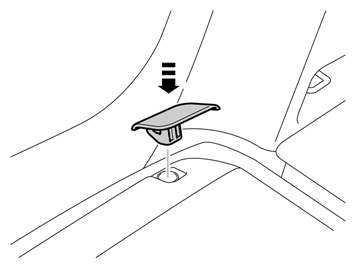
| | Press the protective casing into the holder until it is in contact with the bumper cover. A number of clicks should be heard when the protective casing is pressed in. Check that the protective casing is fitted securely.
|
|  | | IMG-226910 |
|
| | |