2006

Installation Instruction

Installation instructions, accessories
Volvo Car Corporation Gothenburg, Sweden
V70 2006
V70 (00-08) 2006

Instruction NoVersionPart. No.Click to download PDF-version of this Installation Instruction
306643291.0
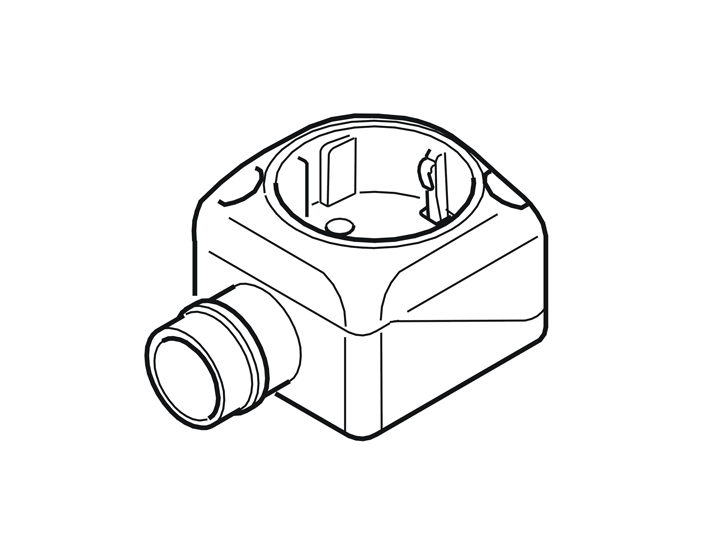
Passenger compartment connector socket


M3603136


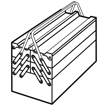
Equipment
A0000162
A0000163
A0000161

M8703902


INTRODUCTION

  • Read through all of the instructions before starting installation.

  • Notifications and warning texts are for your safety and to minimise the risk of something breaking during installation.

  • Ensure that all tools stated in the instructions are available before starting installation.

  • Certain steps in the instructions are only presented in the form of images. Explanatory text is also given for more complicated steps.

  • In the event of any problems with the instructions or the accessory, contact your local Volvo dealer.

 

Preparations

1
M8503600
 

Preparations

  • Remove the centre console's right-hand side panel (1) by first turning the clip in the rear edge ¼ turn anticlockwise, then pull the panel out at the rear edge and pull it away backwards.

  • Remove the sound barrier (2) on the right-hand side by first unscrewing the two screws (3) in the rear edge.

    Prize away the sound barrier at the rear edge so that the clips there release.

    Remove the sound barrier.

2
D8505174
 

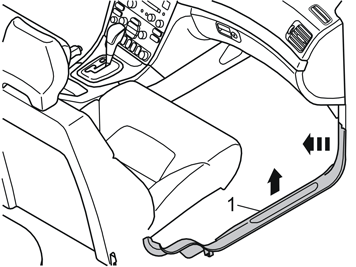
  • Remove the sill moulding (1) by pulling it away starting at the front edge, until the clip there releases. Following which, pull it up until the clips on the underside release. Detach it from the B-pillar panel.

3
D8505175
 

  • Fold the carpet to one side.


Installing the bracket

4
M8504182
 

Installing the bracket

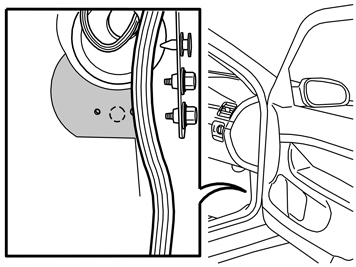
  • Cut away a section of the soundproofing at the A-pillar (the shaded area in the illustration).

5
M8504652
 

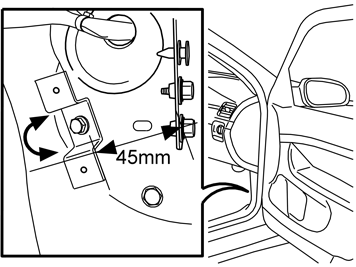
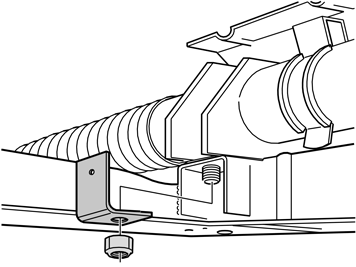
  • Take the short flanged screw and the bracket from the kit.

  • Remove the tape concealing the weld nut.

  • Install the bracket with the screw in the weld nut as illustrated, but do not tighten the screw yet.

  • Turn the bracket to maintain a distance of 45 mm between one corner of the bracket and the centre of the hole for the lower ground screw. See the illustration.

  • Tighten the screw.


Installing the junction connector

6
D8100883
 

Installing the junction connector

  • Remove the engine splash guard.

7
D8200091
 

  • Cut away the engine compartment insulation at the punched metal on the right-hand side down in the engine compartment.

  • Remove the rubber grommet (1) inside the insulation.

  • Cut off the top of the rubber grommet (1).

8
R2900218
 

    If an engine block heater is installed

  • Remove the connectors for the engine block heater and the front engine block heater socket from the bracket on the steering gear.

  • Remove the locking sleeve over the connectors and pull apart both cables.

9
D2900051
 

    If an engine block heater is not installed

  • Remove the nut from the right-hand side of the steering gear.

  • Install the bracket with a new nut from the kit.

  • Tighten the nut. Tighten to 50 Nm (35 lbf.ft.).

10
D3601932
 

  • Grease in the O-rings on the cables and on the branch connector using low temperature grease, part no. 1161417-9.


    Note!

    Ensure that no grease gets onto the connector surfaces.


11
R2900219
 

  • Install the branch connector on the bracket with a screw and nut from the kit. Make sure that the screw does not catch the pipe to the steering assembly on the rear. If this is the case, swap the places for the screw and nut.

    Do not tighten the bracket yet, the cables and locking sleeves must be installed first.

12
D8200253
 

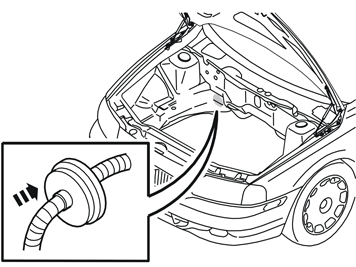
  • Grease in the rubber grommet with low temperature grease, part no. 1161417-9 in order to ease the cable through and to locate it in the hole in the body more easily.

  • Thread the cable for the passenger compartment connector socket through the rubber grommet.

  • Guide the cable for the passenger compartment connector socket through the hole in the body.


    Hint

    Pull the rubber grommet into place from inside the passenger compartment using the cable if it is difficult to position it from the engine compartment side.


13
M3603153
 

  • Pull out a part of the cable for the passenger compartment connector socket from the passenger compartment. Any excess cable should be concealed behind the carpet in the passenger compartment.

  • Take the heat deflector hose and two tie straps from the kit and thread it onto the cable for the passenger compartment connector socket. Pull the heat deflector hose right up to the rubber grommet. Secure the heat deflector hose with both tie straps. If the heat deflector hose is too long, cut it down to a suitable length.

  • Install the cable for the passenger compartment connector socket to socket (1) on the branch connector from the kit.

  • Connect the cable from the engine block heater to the socket (2) on the junction connector.

  • Connect the cable from the front engine block heater socket to the socket (3) on the junction connector.

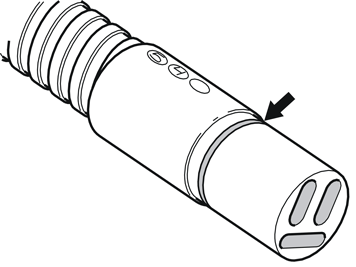
  • Press the locking sleeves (from the kit) over the cable splices. The larger locking sleeve must be on the socket (3).


  • Note!

    Check that the cables do not chafe against sharp edges or moving parts in the engine compartment.


    Tighten the branch connector to the bracket.

  • Reinstall the engine splash guard and torque tighten the screws to 24 Nm (18 lbf.ft.).


Installing the passenger compartment connector socket

14
M8504181
 

Installing the passenger compartment connector socket

  • Partially fold the carpet back over the bracket.

  • Make a hole in the carpet opposite the upper mounting hole in the bracket using a double ended scriber.

15
M3603137
 

  • Take a screw and the passenger compartment connector socket from the kit. Tighten the passenger compartment connector socket to the bracket in the upper mounting.

  • Insert the double ended scriber into the lower mounting for the passenger compartment connector socket. Make a hole in the carpet opposite the lower hole on the bracket.

  • Tighten the lower mounting for the passenger compartment connector socket using a screw from the kit.

16
M3603138
 

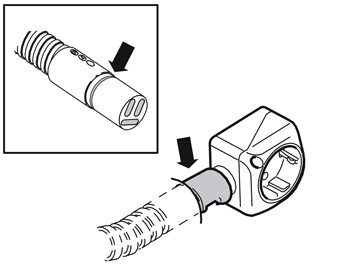
  • Press a locking sleeve (from the kit) onto the passenger compartment connector socket. Slide the locking sleeve as far along the terminal for the passenger compartment connector socket as possible.

  • Take a carpet knife and cut a slit in the carpet just in front of the locking sleeve. Make the cut as long as the diameter of the locking sleeve.


    Note!

    Do not damage any wiring and hoses under the carpet.


  • Remove the passenger compartment connector socket from the bracket and fold the carpet to one side.

17
M3603139
 

  • Thread the cable through the hole in the carpet.

  • Grease in the O-ring with low temperature grease (part no. 1161417-9).


    Note!

    Ensure that no grease gets onto the connector surfaces.


  • Connect the cable to the passenger compartment connector socket. Press a locking sleeve (from the kit) over the joint.

  • Fold the carpet back into position and install the passenger compartment connector socket using both the screws.

  • Reinstall the sound barrier, the centre console's side panel and sill moulding.