| | |
|  | | IMG-225146 |
|
| | |
|  | | IMG-225147 |
|
| | |
|  | | IMG-225148 |
|
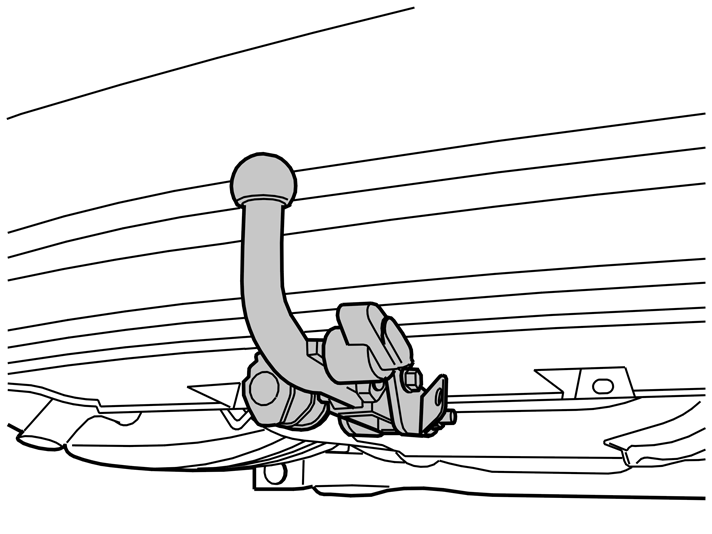
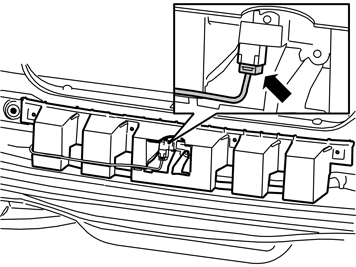
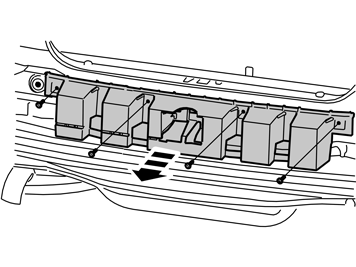
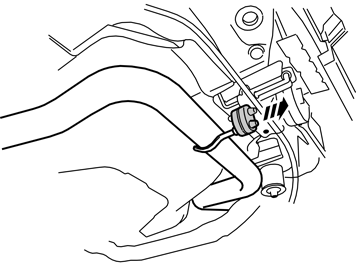
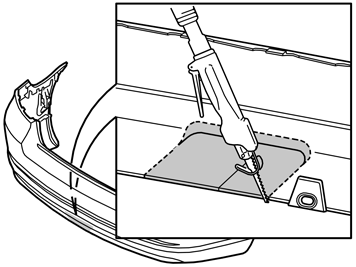
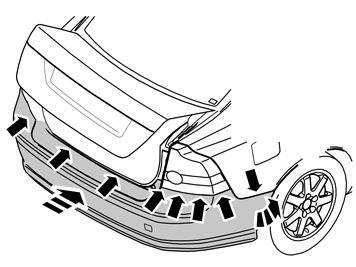
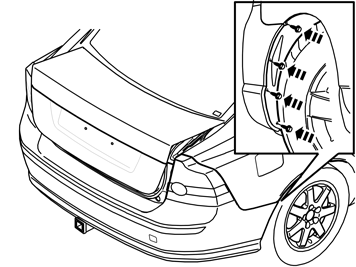
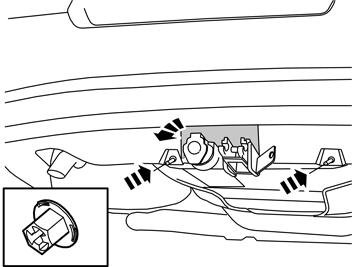
| | Pull out the corner and continue to pull the bumper cover away backwards until the five clips at the side and under the rear lamp have released. Repeat the operation on the other side. Remove the bumper cover by pulling it backwards until the three catches opposite the tailgate opening have released. Unplug the parking assistance connector (if fitted).
|
|  | | IMG-213380 |
|
| | |
|  | | IMG-225149 |
|
| | |
|  | | IMG-225150 |
|
| | |
|  | | IMG-249627 |
|
| | |
| | |
|  | | IMG-249603 |
|
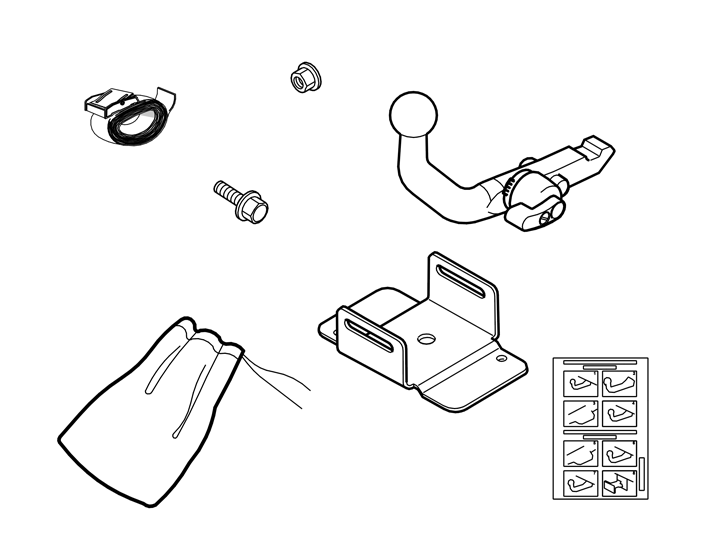
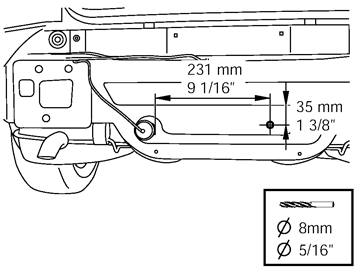
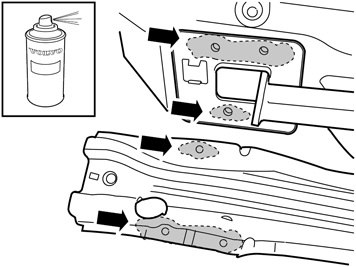
| | Applies to cars without spare wheel Installing the towball holder Detach the rubber grommet and measure the horizontal distance from the edge of the hole.
Note!
Check that there are no cable harnesses obstructing the hole drilling process. |
Measure out for drilling a hole for the screw for the towball holder, and drill out the hole with a Ø 8 mm (5/16 ") diameter drill bit. Deburr the edges of the hole, apply rustproofing agent and remove the drill swarf. Reinstall the rubber grommet.
|
|  | | IMG-226142 |
|
| | |
|  | | IMG-226143 |
|
| | |
| | |
|  | | IMG-225151 |
|
| | Applies to cars with twin rear silencers. Remove the screws in the rear mountings on the right and left-hand sides of the silencers and lower them down to the stop.
Applies to cars with single rear silencer Remove the screw in the rear mounting on the left-hand side of the silencer and lower down to the stop.
|
|  | | IMG-225152 |
|
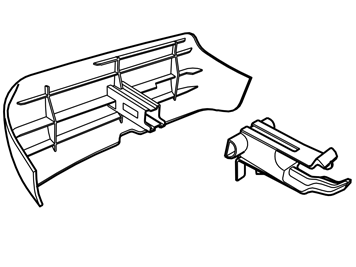
| | Applies to cars with twin rear silencers. Remove the clips to the heat deflector plate on the right and left-hand sides and fold it down toward the silencer so that the holes on the inside of the rear side members are accessible.
Applies to cars with single rear silencer Remove the clips to the heat deflector plate on the left-hand side and fold it down toward the silencer so that the holes on the inside of the rear side member are accessible.
|
|  | | IMG-225153 |
|
|  | | IMG-225154 |
|
| | Illustration A applies to vehicles with 8 cylinders, 6 cylinders and four wheel drive Illustration B applies to other variants |
|  | | IMG-225155 |
|
| | |
|  | | IMG-230735 |
|
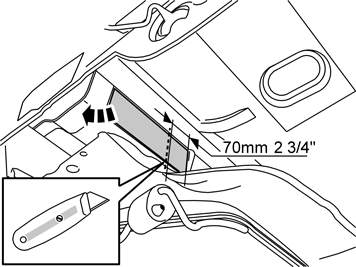
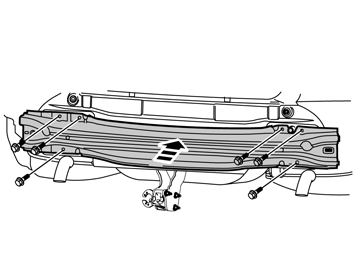
| | Now angle the silencer and radiation shield down to gain optimum accessibility to the holes for mounting the towing member. Measure out a distance of 70 mm (2 ¾ ") from the centre in the embossing on the insides of the side members and backwards on the protective tape covering the mounting holes for the towing member. Cut off the protective tape and discard the long rear section.
|
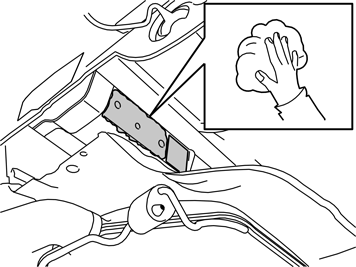
| | Installing the towing member |
|  | | IMG-230736 |
|
| | Installing the towing member |
|  | | IMG-260825 |
|
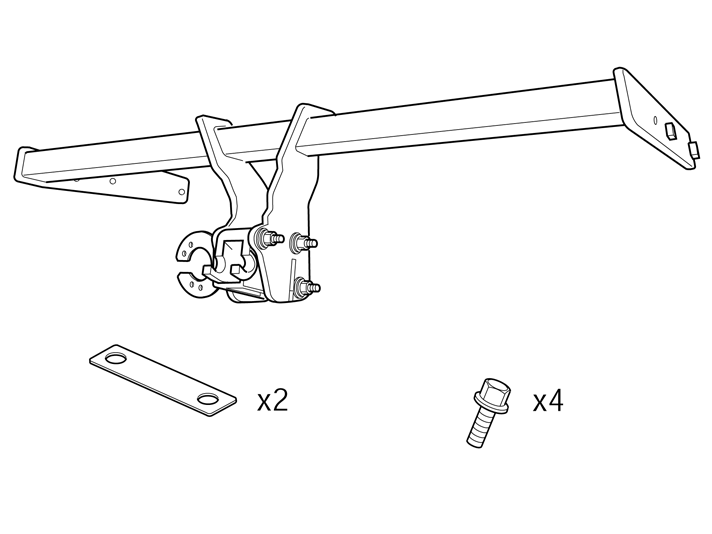
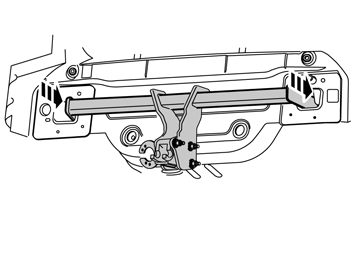
| | Check that the contact surfaces inside the side members are clean, if not, clean them opposite where the towing member's side plates shall be tightened. Take the towing member from the kit and insert the two side plates in the holes in the rear edge of the side members.
|
|  | | IMG-249373 |
|
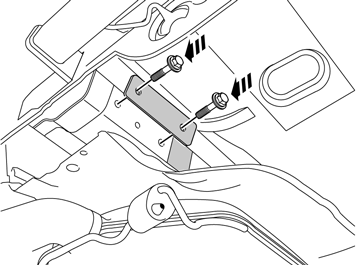
| | Take screws and the reinforcement bar from the kit. Get assistance to hold and adjust the position of the towing member when the screws are tightened into the towing member's weld nuts. The silencer and deflector plate need to be pressed down to allow the screws and reinforcement bar to be positioned and torque tightened. Tighten the screws alternately on both sides.
|
|  | | IMG-249374 |
|
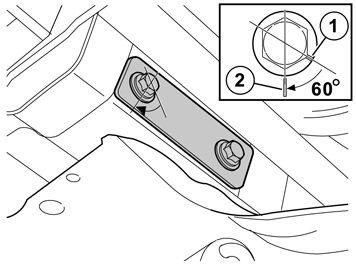
| | Tightening the screwed joint Tighten the screws to 90 Nm (66.5 lbf.ft.) and angle tighten to 60°. When angle tightening screwed joints in a confined spaces, a protractor, applied to the torque wrench, cannot be used. An Allen screw head is used to determine the turning angle instead. Make a mark on the flange of the screw head (1). Make a second mark (2) on the reinforcement bar. Now tighten the screw so that the screw head marking (1) lines up with the marking (2) on the reinforcement bar. Repeat for all screws.
|
| | |
|  | | IMG-231372 |
|
| | Applies to cars with twin rear silencers. Reinstall the heat deflector plate and the rear mountings for the silencer. Torque tighten the mounting screws to 50 Nm (37 Lbf.ft.). Carry out the equivalent operation on the left-hand side for cars with single rear silencer.
|
|  | | IMG-225406 |
|
| | |
|  | | IMG-225404 |
|
|  | | IMG-225405 |
|
| | Illustration A applies to vehicles with 8 cylinders, 6 cylinders and four wheel drive Illustration B applies to other variants |
|  | | IMG-225408 |
|
| | |
|  | | IMG-260826 |
|
| | |
|  | | IMG-225410 |
|
| | |
|  | | IMG-225411 |
|
| | |
|  | | IMG-225412 |
|
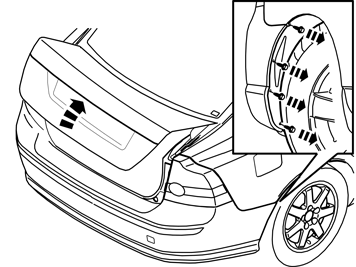
| | Apply tape to the outside of the bumper cover, opposite the markings on the inside and right up to the first joint line on the lower section of the bumper cover. This is in order to protect the paintwork from the base of the saw when sawing out the cut-out for the towbar. Cut out the cut-out following the existing markings.
Note!
Do not damage the painted surface of the bumper cover. Cut so that the raised edge on the inside remains. The raised edge marks the cut-out. |
Smooth off the sawn edges with a fine toothed file.
Note!
Install the towbar connector with cable harness in accordance with the applicable installation instructions before reinstalling the bumper cover. |
|
|  | | IMG-225413 |
|
| | |
|  | | IMG-228974 |
|
| | |
|  | | IMG-225415 |
|
| | |
| | |
|  | | IMG-226147 |
|
|  | | IMG-226145 |
|
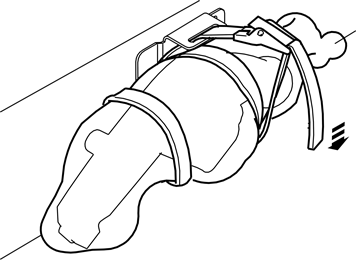
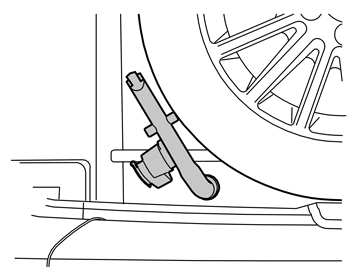
| | Storing the towball Applies to cars without spare wheel Remove the bag from the kit, put the towball inside and tie it up.
The towbar must be positioned in the holder as indicated in Illustration B Wind the long strap twice around the bag and tighten firmly.
|
|  | | IMG-226150 |
|
|  | | IMG-226148 |
|
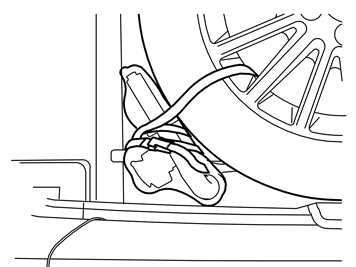
| | Applies to cars with spare wheel Remove the bag from the kit, put the towball inside and tie it up.
The towbar must be positioned as in Illustration B Wind the long strap twice around the bag and once around the wheel and tighten firmly.
|
|  | | IMG-226151 |
|
|  | | IMG-226152 |
|
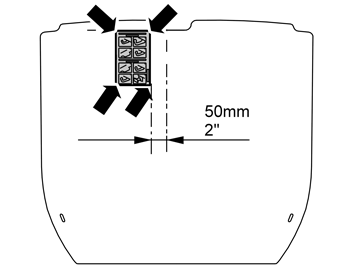
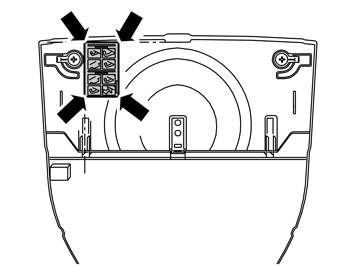
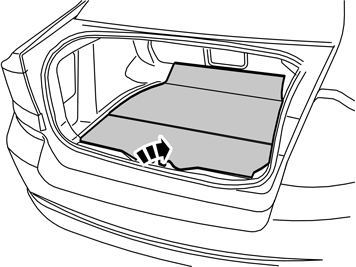
| | Affixing the label Illustration A applies to cars with standard cargo compartment carpet Illustration B applies to cars with cargo compartment carpet with integrated grocery bag holder Take the label from the kit and affix it firmly to the underside of the cargo compartment carpet as illustrated. In addition, use staples in the four corners of the labels.
|
|  | | IMG-226908 |
|
| | |
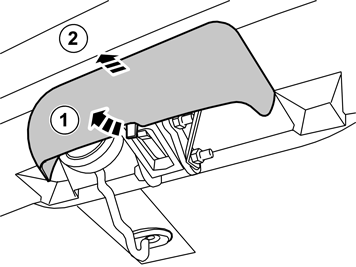
| | Installing/removing the protective cover |
|  | | IMG-226909 |
|
| | Installing/removing the protective cover |
|  | | IMG-227105 |
|
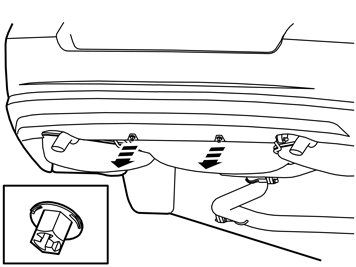
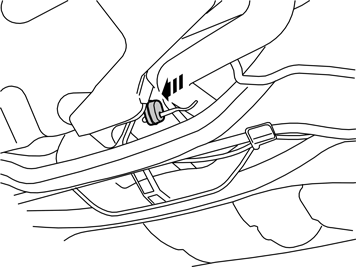
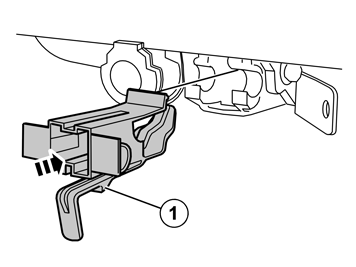
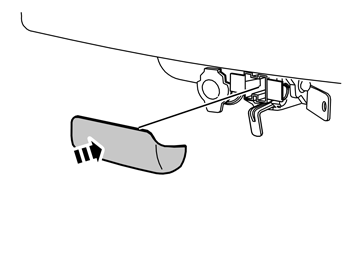
| | Press the protective casing into the holder until it is in contact with the bumper cover. A number of clicks should be heard when the protective casing is pressed in. Check that the protective casing is fitted securely.
|
|  | | IMG-226910 |
|
| | |