| | |
|  | | R7700442 |
|
| | General guidelines For safety reasons, when using RUD-comfort centrax type chains, the recommended speed limit of 50 km/h
must never be exceeded. In some countries this speed limit may be even lower. This should be respected The driving characteristic of cars with snow chains are different!Braking distances are increased on roads clear of snow or
ice Always adapt your driving to the road conditions! The chains must only be used in pairs on the driving wheels The car must not be driven if the snow chains are not correctly installed. Ensure that the chain is evenly mounted over the entire wheel.
The tension of the chain is correct if it can be lifted approximately 1.5 cm from the tyre. If the chain is incorrectly positioned (if it is too
loose for example, it may knock against other parts of the vehicle. Check if the chain is correctly positioned and adjust the tension if necessary
After driving longer stretches, the chains should be checked to ensure that they are still correctly positioned The air pressure listed by the manufacturer also applies when using snow chains RUD-comfort centrax snow chains have been developed to improve the grip and braking capacity of the drive wheels (on snowy
or icy road surfaces). They are not intended for any other usage Avoid heavy acceleration and wheel spin which cause considerable wear to the chains Remember that the service life of the chains is fully dependent on the way in which you drive. Careful driving will increase the service
life of the chains Care instructions:Clean the chains using hot water. Dry the chains thoroughly after each usage. Never treat
the chains with oil! The chains are manufactured from high quality steel. However they have not been rust-proofed. Minor rust does not affect the
quality of the chains Snow chains such as RUD-comfort centrax are an important part of the safety equipment for winter
driving. Always follow these instructions carefully to ensure many years of use from your chains and to ensure you arrive at your destination safely.
We accept no liability for personal injury or material damage, such as damage to the chains, if these instructions have not been followed
Always follow the car manufacturers instructions about the use of snow chains in the owner's manual supplied with your car. This also
applies to four wheel drive vehicles Before setting off, you should check your RUD-comfort centrax chains and ensure that they are correctly positioned. First of
all check that the tyre size given on the packaging matches the tyre dimensions of your car. Warning: the codes must be exactly the same. There is a
considerable difference between, for example, 225/60 R 16 and 225/55 R 16! RUD-comfort centrax chains have been
developed to suit tyre dimensions for summer and winter tyres according to DIN and ETRTO If it is not possible to obtain the correct size and fit of snow chains (see the instructions), they should not be used. If this is the
case, please contact your dealer Follow these instructions closely. If these instructions are not followed, there is a risk of damage to the snow chains or the car. This
could also increase the risk of an accident Check the chains each time they are installed on the tyres. If the chains are more than 50% worn, or if a link has broken, the chains
should not be used. If this should happen, send the chain to the manufacturer for repair. If a link has broken, the chains must be removed
immediately to prevent damage to the car Only the manufacturer should carry out repairs to the chains. Other repairs will
invalidate the separate warranty.
|
| | |
|  | | R7700455 |
|
|  | | R7700456 |
|
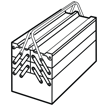
| | Snow chain components Illustration A 1 = arm 2 = lever 3 = safety release 4 = tensioner strap 5 = quick-tensioner 6 = strap girdle 7 = housing 8 = mounting arm 9 = yellow button.
Illustration B |
| | |
|  | | R7700464 |
|
| | |
|  | | A7700196 |
|
| | |
|  | | A7700197 |
|
| | |
| | Installing the snow chains Note!
The snow chains must only be installed on the front wheels. All operations must be carried out on both the front wheels |
|
|  | | A7700198 |
|
| | Press a suitable adapter (A) into place on the wheel Tighten the adapter. Tighten to 70±5 Nm (52±3.7 lbf.ft.). Use a torque spanner or a socket set.
Note!
Do not use impact drivers. |
Ensure that the adapter is securely installed.
|
|  | | R7700454 |
|
| | |
|  | | R7700466 |
|
| | |
|  | | R7700465 |
|
| | Press in the yellow button (A) on the mounting arm (B). Adjust the handle on the mounting arm so that it is pointing towards the centre
of the hub.
Note!
The mounting arm must be installed in this way. |
Press the mounting arm on to the adapter until the catches engage.
Note!
The yellow button must spring back to its original position. |
Ensure that the catches are secure on the adapter.
|
| | Adjusting the tension of the chain |
|  | | R7700467 |
|
| | Adjusting the tension of the chain |
|  | | R7700461 |
|
| | |
|  | | R7700450 |
|
| | |
|  | | R7700451 |
|
| | |
|  | | R7700469 |
|
| | |
|  | | R7700449 |
|
| | The tensioner strap must be tensioned when the chain net is in place. |
| | |
|  | | R7700462 |
|
| | Adjusting the chain net There must be play of approximately 15 mm (9/16”) between the surface of the tyre and the chain net. |
| | Illustration A Illustration B The shortening points (open chain links) are beside the stud elements. Illustration C |
|  | | R7700460 |
|
|  | | R7700459 |
|
| | Illustration A Illustration B Hook the chain net back on to the stud element Jerk the shortened chain down to its original position If necessary, press the shortened chains into the stud element by hand.
|
| | |
| | |
|  | | R7700470 |
|
| | |
| | | R7700466 |
|
| | |
|  | | R7700471 |
|
| | |
|  | | R7700472 |
|
| | |
| | |