| | |
|  | | A3000303 |
|
| | Preparations Turn the ignition switch to position 0. Remove the key from the ignition switch (Does not apply to cars with automatic gearboxes) Clean the bumper. Use a mild soap solution.
Note!
Wait at least five minutes before disconnecting the connectors or removing other electrical equipment. |
|
|  | | M8503004 |
|
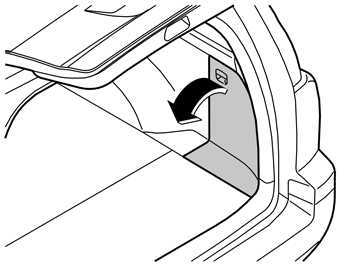
| | Remove the rear floor hatch. Open the rear floor hatch and pull it straight backwards. Place the floor hatch to one side. Turn the handles on the storage box on the right and left-hand sides. Lift it out Remove the front floor hatch. Lift the rear edge of the floor hatch. Pull it straight backwards.
|
|  | | M8503006 |
|
| | |
|  | | M8503130 |
|
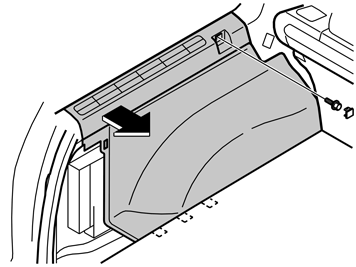
| | Remove the left side panel. Remove the cover and the screw from the front edge Pull the top edge of the panel out until the clips release. Fold the panel inwards. Lift the panel out.
|
|  | | M8101064 |
|
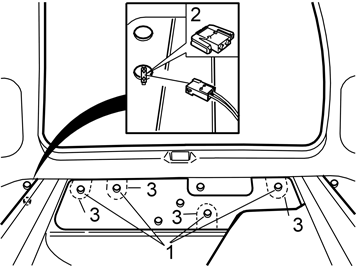
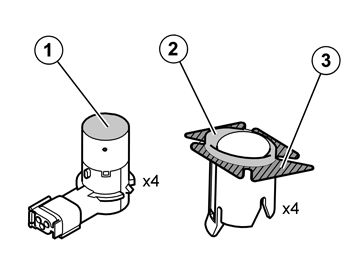
| | Applies to cars with lining mats with four perforations Remove the perforated sections (3) from the lining mat.
Note!
Remove the battery cover to facilitate removing the nuts. |
|
|  | | M8601264 |
|
| | Removing the rear bumper (applies to the V70) Slacken off and remove the screw (2) in the upper edge of the end on both sides. Slacken off and remove the screw (3) in the lower edge of the wheel arch on both sides Push in the centre of the four clips on the underside of the bumper cover. Remove the four clips by pulling them through the holes.
|
|  | | M8601238 |
|
|  | | M8600679 |
|
| | Removing the rear bumper (applies to the XC70) Illustration A Illustration B Hint
Press in the screw so that the screw heads bottoms. |
|
|  | | M8601266 |
|
| | Removing the rear bumper (applies to all) Hint
This operation is easier with two people. |
|
|  | | M8600423 |
|
| | Note!
The backing paper is used to protect the paint. |
|
|  | | M8601242 |
|
| | Note!
Do not remove the aerial from the foam. |
|
| | |
|  | | M8601265 |
|
| | Installing the sensors Applies to the V70 Pre-drill the holes through the centre of the markings (1). Use a Ø3 mm (1/8”) diameter drill bit. Drill from the inside of the bumper cover. Drill out the hole. Use a Ø8.5 mm (21/64”) diameter drill bit.
|
|  | | IMG-215300 |
|
|  | | M8601243 |
|
| | Applies to the XC70 Illustration A Measure out for locating the outer sensors, from the existing markings on the inside of the skid plate.
Note!
When measuring, use a flexible measuring tool that follows the form of the bumper cover. |
Measure 86 mm (3 3/8”) from the underside of the plastic catch (1) and straight down. Mark this point. Following which, draw a straight line from the centre of the existing marking to the point just marked. Measure 478 mm (18 13/16”) from the centre of the existing marking along the line, and mark there for the sensor's position. Carry this out on the right and left-hand sides of the bumper. Pre-drill the holes in the two points marked in the bumper cover, and in the two existing markings in the skid plate, using a Ø3 mm (1/8”) diameter drill bit. Drill out the four holes. Use a Ø8.5 mm (21/64”) diameter drill bit.
Illustration B |
|  | | M8600666 |
|
| | |
|  | | M8600426 |
|
| | Clean the inside of the bumper cover using a mild soap solution. Clean around the holes and their inner edges with a cleaning cloth (P/N 9192678). Allow to dry. Apply a thin layer of activator (P/N 8637076) on the cleaned surfaces. Allow to dry.
|
|  | | IMG-214381 |
|
| | Applies to the V70 Clean the sensor surface (1) on the sensors, and the surfaces (2) and (3) on the sensor holders. Use a cleaning cloth. Allow to dry. Apply a thin layer of activator on the cleaned surfaces. Allow to dry.
|
|  | | A3601752 |
|
| | Remove the yellow protective film from one side of the tape Secure the tape on the sensor holder Carry out the above procedure on the remaining three sensor holders.
|
|  | | M8600427 |
|
| | Applies to all models Remove the orange protective film from the pieces of tape on the sensor holders Install the holders for the sensors. The narrow side must be pointing upward. Install horizontally in line with the bumper casing, as illustrated.
Note!
The tape adheres immediately. |
Caution!
Incorrect positioning of the sensors may result in partial or complete malfunction. |
|
|  | | M8601277 |
|
|  | | M8601278 |
|
| | Illustration A Illustration B |
|  | | D8601210 |
|
| | |
|  | | M8601227 |
|
| | Reinstall the foam rubber and plastic on the inside of the bumper Pull through the sensor cable and secure it in the in position along the plastic Press the sensor cable into the protruding guide (1) on the left-hand side of the bumper cover.
|
|  | | D8601213 |
|
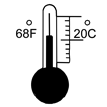
| | Only applies to the V70 Note!
Take care to ensure that the activator has dried, at least ten minutes, before painting. |
Position the bumper so that sensors can be painted. Ensure that backing paper covers the area around the sensor holes. Paint the sensors and holders using the same colour code paint as the car. Use paint recommended by Volvo. Apply a maximum of two coats. When the paint has dried, remove the backing paper.
Caution!
Too many layers of paint may result in partial or complete malfunction. |
|
|  | | M8601246 |
|
| | |
|  | | M8600481 |
|
|  | | M8601247 |
|
| | Illustration A applies to the V70 Hint
This operation is easier with two people. |
Illustration B applies to the XC 70 Note!
Ensure that the loose mountings (A) for the sides of the bumper are in position on the right and left sides. |
|
|  | | M8101296 |
|
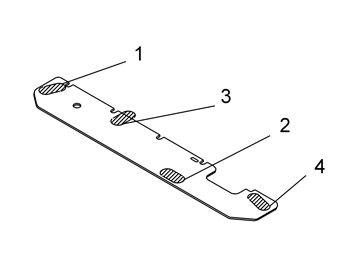
| | Applies to cars with lining mats with four perforations Install the rubber tabs from the kit over the 4 x installed screws as follows:
Align the rubber tabs (1, 4) edge to edge with the lining mat. If necessary, cut away the area (1) around the nut so that the nut is accessible Compress the rubber tab (2) slightly to align in the cut-out Align the rubber tab (3) so that the lower edge is edge to edge with the lining mat. Cut off the section protruding over the lining mat. Do not cut off too much Make a cut using a knife in the rubber tab (4). This is so that the cable harness for the sensor can be inserted.
Applies to cars with lining mats with one perforation Install a new lining mat.
|
| | Installing, parking assistance module (PAM) |
|  | | D3904974 |
|
| | Installing, parking assistance module (PAM) |
|  | | D3904975 |
|
| | |
|  | | D8903603 |
|
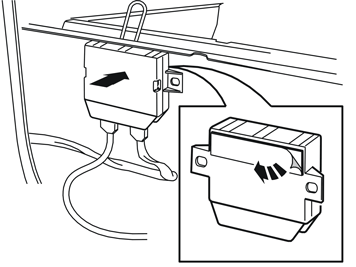
| | Clean the vertical panel surface under the member where the control module will be located. Use a mixture of 30% windscreen washer fluid and 70% water Apply activator to the panel surface under the member Allow the activator to dry completely, for at least 10 minutes.
|
|  | | D3904844 |
|
| | Remove the backing from the tape on the Velcro strap for the control module. Secure the control module to the activator covered panel surface below the member Press the tape on the Velcro strap hard so that the adhesive bonds.
|
| | |
|  | | M3904985 |
|
| | |
|  | | M3904986 |
|
| | |
|  | | D8502226 |
|
| | |
| | |
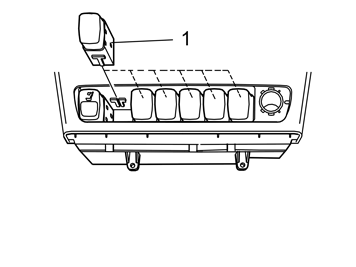
| | Finishing work Programme the software in accordance with the service information in VIDA. Check the function of the parking assistance system. Check that the parking assistance system can be turned off using the switch in the centre console.
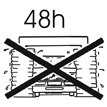
Caution!
Leave the car indoors for 2 hours after carrying out the work. Do not wash the car for 48 hours. |
|