2007 R AWD L.H.D

Installation Instructions

Installation instructions, accessories
Volvo Car Corporation Gothenburg, Sweden
V70 2007
V70 (00-08) 2007

Instruction NoVersionPart. No.Click to download PDF-version of this Installation Instruction
94869571.0
Trim strip, wood patterns


Equipment
A0000162

M8502738


INTRODUCTION

  • Read through all of the instructions before starting installation.

  • Notifications and warning texts are for your safety and to minimise the risk of something breaking during installation.

  • Ensure that all tools stated in the instructions are available before starting installation.

  • Certain steps in the instructions are only presented in the form of images. Explanatory text is also given for more complicated steps.

  • In the event of any problems with the instructions or the accessory, contact your local Volvo dealer.

1
M8502716
 

    Applies to both front doors:

  • Remove the cover (1) for the door mirror. First pull the cover straight out

  • Push in the centre of the clips (2). Remove the clips

  • Remove the cover (3) on the door handle. Use a weatherstrip tool. Start at the underside

  • Remove the two screws (4) from under the cover

  • Disconnect the door panel. First slide the panel upwards and unhook the top edge.

2
M3903029
 

  • Remove the connectors (1) on the door control module

  • Pull the door opener handle (3). Remove the mechanical cable (2) on the reverse. First pry up the locking lugs

  • Remove the door panel.

3
M8503454
 

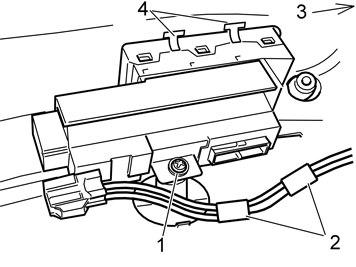
    Applies to the driver's door:

  • Remove the screw (1)

  • Remove the door control module cable from the two clamps (2). Remove the cable connector from the treble loudspeaker (3)

  • Press in the two catches (4) on each side of the door control module. Remove the module.

4A
M8503199
4B
M8503060
4C
M8503377
4D
M8503197
 

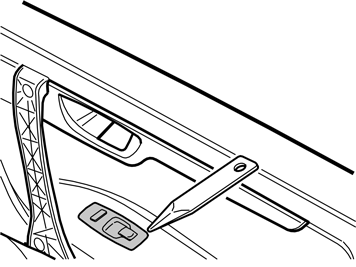
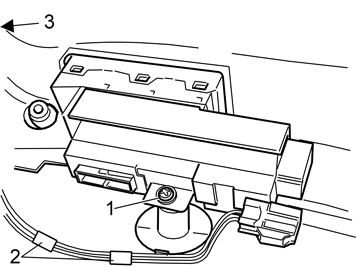
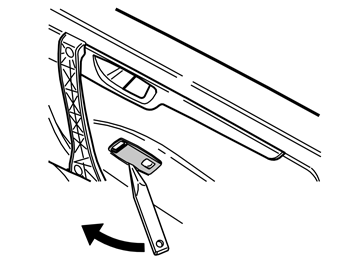
    Illustration 4A - D applies to the passenger door: A

  • Remove the panel by the power window button. First carefully pry off the panel using a weatherstrip tool.

    B

  • Remove the screw (1)

  • Remove the door control module cable from the two clamps (2). Remove the cable connector from the treble loudspeaker (3).

    C

  • Insert the weatherstrip tool as illustrated. Carefully pry the left side of the door control module from the mountings.

    D

  • Carefully pry off the other side of the door control module using the weatherstrip tool. Remove the module.

5
M8503061
 

    Applies to both front doors:

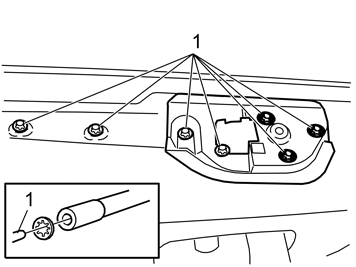
  • Remove the three screws (1) for the left-hand inner handle for the door

  • Remove the inner handle.

6
M8503062
 

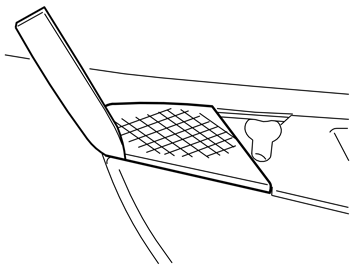
  • Carefully remove the small loudspeaker grille. Pry around the edge using a plastic weatherstrip tool. NOTE! Do not damage the loudspeaker grille.

7
M8503118
 

  • Remove the six lock facings (1) holding the trim strip at the door panel. Use a screwdriver to pry up the rear lock facings slightly. Then cut the lock facings using cutting pliers. Use the bent section of a double ended scriber to pull up the front lock facings slightly (sunk in the plastic panel) to cut off them off.

8
M8503064
 

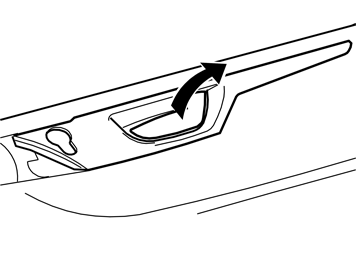
  • Remove the trim strip. First pull the door opener handle. Pull off the trim strip.

9
M8503063
 

  • Install the new trim strip on the door panel. Press the trim strip into place

  • Create a counterhold on the trim strip using a soft, clean rag. This is to prevent damage. At the same time install locking washers on the lugs (1) on the reverse of the door panel. Securely press the locking washers into place as illustrated. NOTE! Do not damage the door panel and trim strip.

10
 

    Applies to both front doors:

  • Reinstall the loudspeaker grille

  • Reinstall the inner handle for the door. Screw the door handle into place

  • Press the door control module into place. Tighten using the screws

  • Reinstall the cable in the clamps. Connect the cable connector to the treble loudspeaker.

    Applies to the passenger door:

  • Reinstall the panel by the power window button.

    Applies to both front doors:

  • Connect the connectors to the door control module. Reinstall the mechanical cable for the door opener

  • Reinstall the door panel, according to point 1.

11
M8503065
 

    Applies to the rear doors:

  • Push in the centre of the clips (1). Remove the clips

  • Remove the blind cover plug (2) and the screw from under it

  • Remove the screw (3) in the door opener (4)

  • Disconnect the door panel (5). First slide the panel upwards and unhook the top edge.

12
M3903030
 

  • Remove the connector (1) for the door control module

  • Pull the door opener handle (3). Remove the mechanical cable (2) on the reverse. First pry up the locking lugs

  • Remove the door panel.

13
M8503117
 

  • Remove the six lock facings (1) holding the trim strip at the door panel. Use a screwdriver to pry up the lock facings slightly. Cut off the lock facings using cutting pliers.

14
M8503067
 

  • Remove the trim strip. First pull the door opener handle. Pull off the trim strip.

15
M8503066
 

  • Install the new trim strip on the door panel. Press the trim strip into place

  • Create a counterhold on the trim strip using a soft, clean rag. This is to prevent damage. At the same time install locking washers on the lugs (1) on the reverse of the door panel. Securely press the locking washers into place as illustrated. NOTE: Do not damage the door panel and trim strip.

16
 

  • Connect the connector to the door control module. Reinstall the mechanical cable for the door opener

  • Reinstall the door panel, according to point 11.

17
M8503068
 

    Mounting the trim strip on the cover for the glove compartment:

  • Open the cover for the glove compartment

  • Remove the four screws (1) holding the trim strip (2) at the cover. Install the new trim strip (from the kit) in place. Tighten at the cover using the four screws.