| | |
|  | | R3501343 |
|
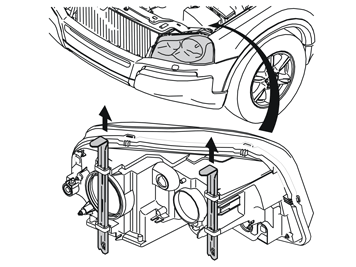
| | Preparations Steps 1-2 apply to all |
|  | | R3501493 |
|
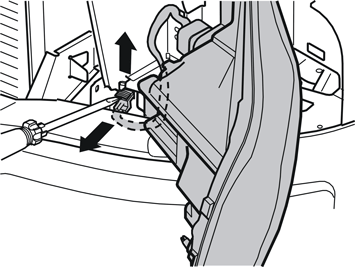
| | Carefully prize up the catch on the connector for the headlamp using a screwdriver. Pull the catch up completely, detach the connector and place the headlamp to one side.
|
| | Installing the front engine block heater socket |
|  | | R8600944 |
|
| | Installing the front engine block heater socket Steps 3-7 apply to cars up to and including model year -2006 |
|  | | R8600921 |
|
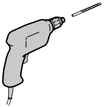
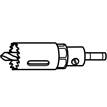
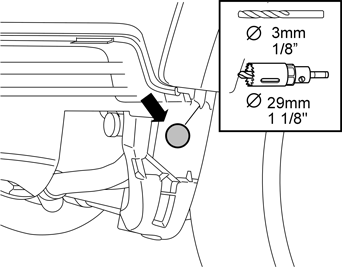
| | Measure out for drilling the front socket hole as illustrated. Pre-drill the hole using a ∅3 mm (1/8") bit. Drill out the hole. Use a ∅29 mm (1 1/8") diameter hole saw. Remove any swarf.
|
|  | | R8600945 |
|
| | |
|  | | R8600920 |
|
| | |
|  | | R8703775 |
|
|  | | R8703776 |
|
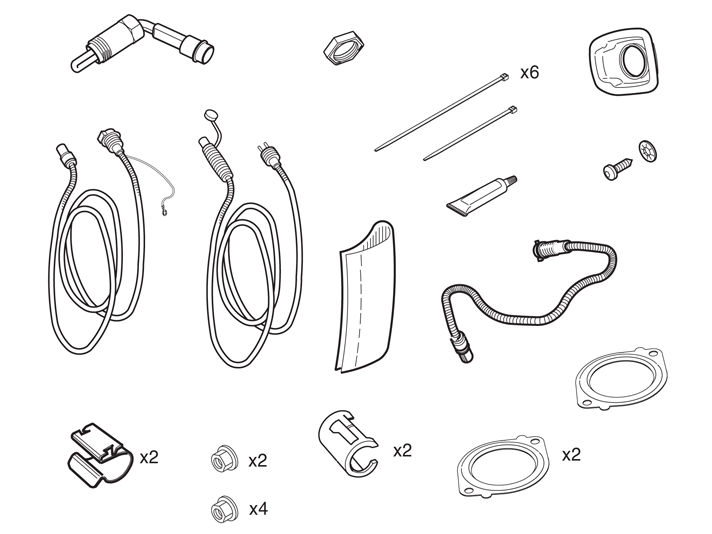
| | Illustration A Take the front socket, protective cover and plastic nut from the kit. Fit the protective cover onto the front socket's connector. Turn the connector so that the cover is opened to the left-hand side of the car as illustrated.
Illustration B Install the plastic nut. Tighten the plastic nut firmly. Connect the cable to the front socket for counterholding when the plastic nut is tightened. Guide down the front socket ground cable on the left-hand side of the left-hand side member.
|
|  | | IMG-240660 |
|
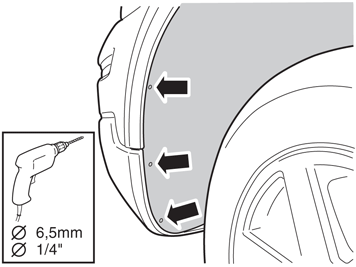
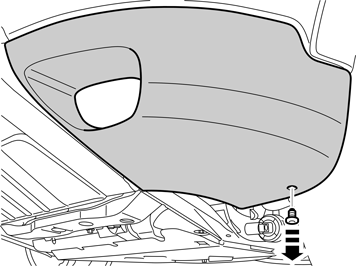
| | Steps 8-20 apply to cars from and including model year 2007- Step 8 applies to cars with fuel-driven parking heater installed. Drill out the three rivets from the front edge of the left wing liner. Remove the remains of the rivets. Move the wing liner aside and fasten it so that the parking heater is accessible.
|
|  | | IMG-231722 |
|
| | |
|  | | IMG-231723 |
|
| | |
|  | | IMG-231725 |
|
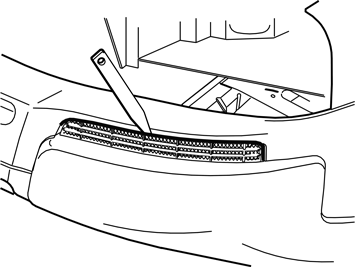
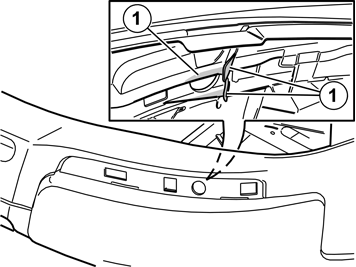
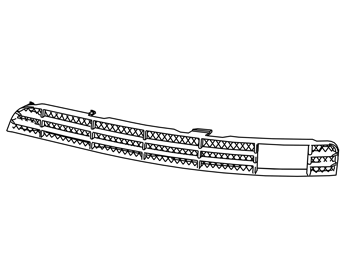
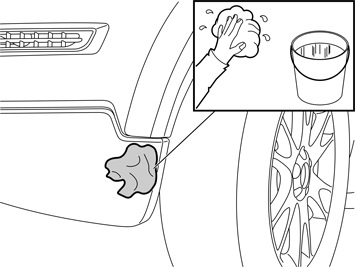
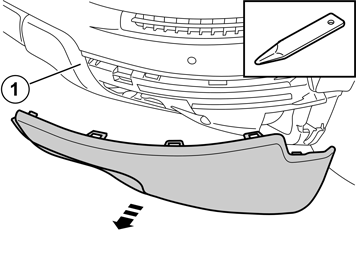
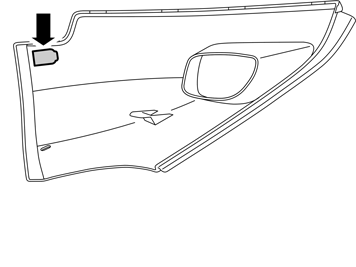
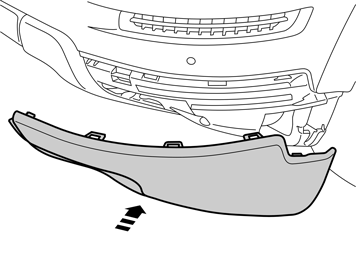
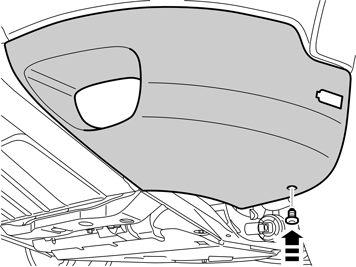
| | Remove the panel above the front fog lamp by carefully prizing it loose from the bumper cover using a weatherstrip tool. The panel is secured all round with catches. The corner (1) of the second panel section must be pried loose as it overlaps the panel.
|
|  | | IMG-231682 |
|
| | |
|  | | IMG-231726 |
|
| | Drill a Ø 29 mm (1 1/8 ") diameter hole using a hole saw according to the existing marking in the lower edge of the bumper cover. Pre-drill using a Ø 3mm (1/8 ") diameter drill bit.
Note!
It is important that the hole is drilled right in the centre of the marking in order to correspond with the hole cut out earlier. |
Even out the hole edges and remove the drill swarf.
|
|  | | IMG-231727 |
|
| | |
|  | | IMG-231728 |
|
| | |
|  | | IMG-231729 |
|
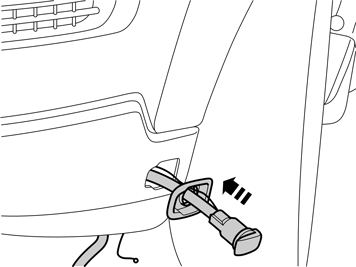
| | Take the protective cover from the kit and press it into the hole cut in the bumper cover. Take the cable for the front engine block heater socket with ground lead from the kit and thread them through the protective cover.
|
|  | | IMG-231730 |
|
|  | | IMG-231731 |
|
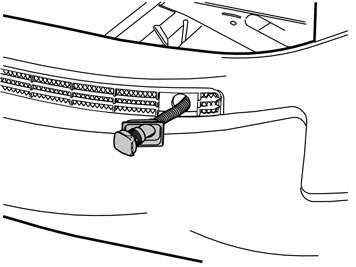
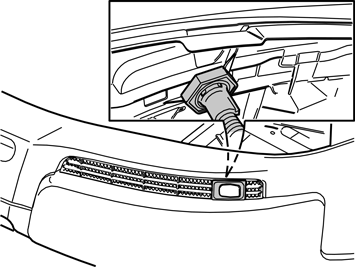
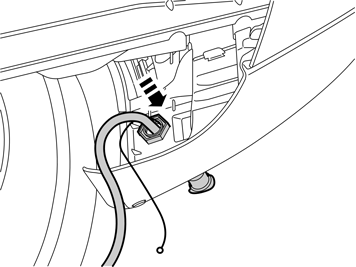
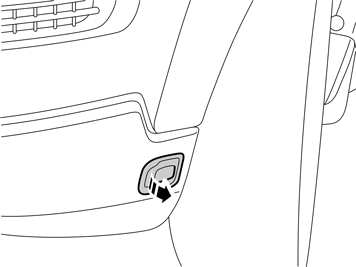
| | Illustrations A and B Install the nut from the kit. Rotate the connector for the front engine block heater socket so that the cover opens backwards (Illustration B). Tighten the front engine block heater socket to the bumper cover. Plug the electrical connector into the front engine block heater socket. Use the connector as a counterhold when tightening. Remove the cover on the radiator expansion tank.
|
|  | | IMG-240661 |
|
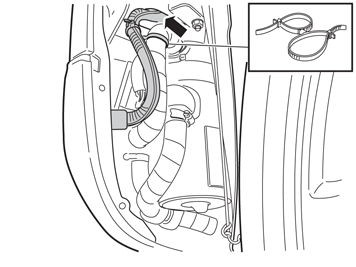
| | For cars with fuel-driven parking heater installed. Route the cable to the front intake with the ground cable along the parking heater induction pipe. Secure them to the pipe with a double tie strap. Route the cables to the underside of the bracket beneath the headlamp.
Applies to cars without fuel-driven parking heater Route the front intake cable to the underside of the bracket beneath the headlamp.
|
|  | | IMG-240663 |
|
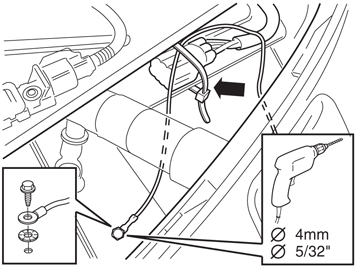
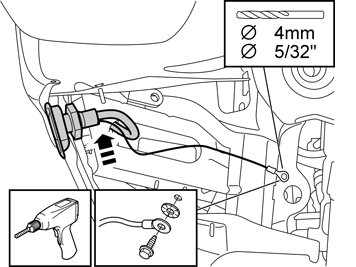
| | Step 19 applies to cars with fuel-driven parking heater installed. Drill a hole in the front/top edge of the side member with a Ø4 mm (5/32") bit. Apply anti-corrosion agent to the edges of the holes and secure the ground cable with the enclosed Ø4.8 mm (3/16") flanged screw and toothed washer. Secure the excess length of ground cable with a tie strap from the kit. Clamp it at the grey connectors of the parking heater.
|
|  | | IMG-231732 |
|
| | Drill a hole in the front/lower edge of the side member with a Ø4 mm (5/32") bit. Apply anti-corrosion agent and secure the ground cable with the enclosed Ø4.8 mm (3/16") flanged screw and toothed washer.
Note!
Connect the ground cable to the side member, not to the subframe. |
Secure the excess ground cable length with a tie strap from the kit.
|
| | Installing the engine block heater, applies to all car models |
|  | | R2102945 |
|
| | Installing the engine block heater, applies to all car models |
|  | | R2103194 |
|
| | |
|  | | R2103153 |
|
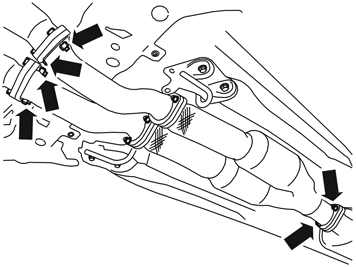
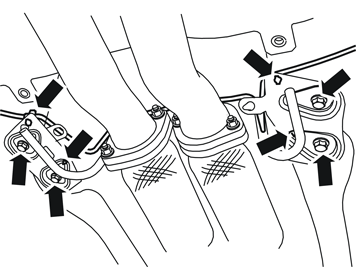
| | Detach the pipe above the exhaust manifold from the clips in the brackets to the exhaust manifold's front mounting. Remove the four screws in the brackets Detach the heat deflector plate's two clips from the brackets. Remove the exhaust pipe and catalytic converters.
Note!
Take care with the twisted parts of the exhaust manifold. |
|
|  | | R2900483 |
|
| | |
| | Illustration A Illustration B Illustration C |
|  | | R2900485 |
|
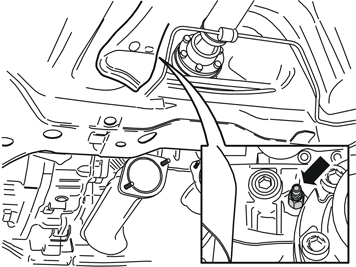
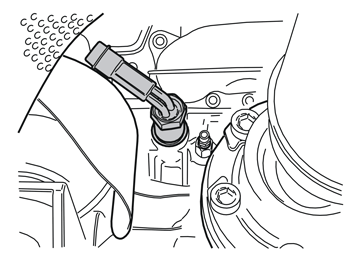
| | Take the heater from the kit.
Hint
Try to rotate the connector in the heater before installation to reduce any friction. |
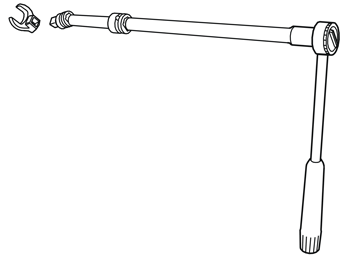
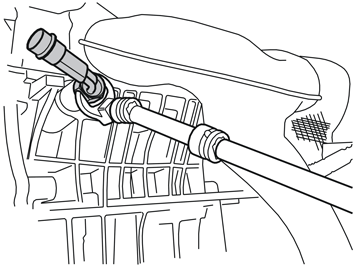
Brush thread sealant P/N 1161056 on the threads. Install the heater in the engine block and manually screw it on as far as possible. It may be difficult to make the threads engage in the hole as the connector rotates stiffly in the threaded part of the heater.
|
|  | | R0801928 |
|
|  | | R3603707 |
|
| | Illustration A Illustration B |
|  | | R3603709 |
|
| | |
|  | | R3603713 |
|
| | |
|  | | R3603718 |
|
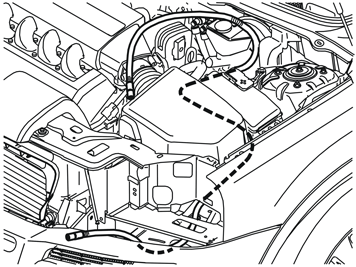
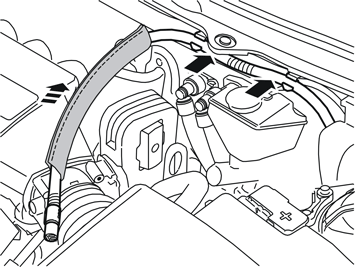
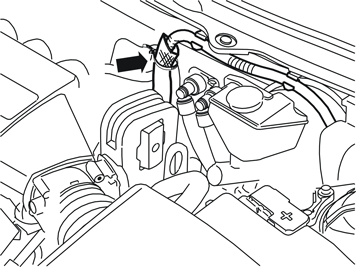
| | Take the joint cable from the kit and route it under the plate beneath the left-hand headlamp. Continue to route it back along the left-hand side of the air cleaner and between the air cleaner and fuse holder. Route it further backwards, under the ABS system and up between the cable duct and brake fluid reservoir. Clamp it in with tie straps from the kit. Check that the cable does not chafe against sharp edges or moving parts in the engine compartment.
Caution!
Do not clamp the cable against brake pipes, fuel lines or air conditioning (A/C) pipes. |
|
|  | | R3603715 |
|
| | |
|  | | R3603716 |
|
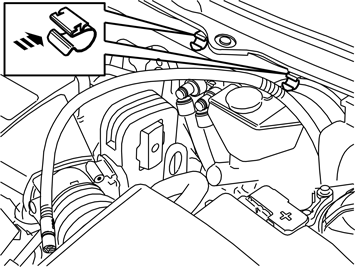
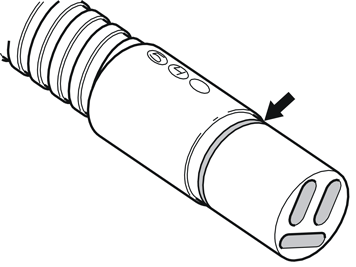
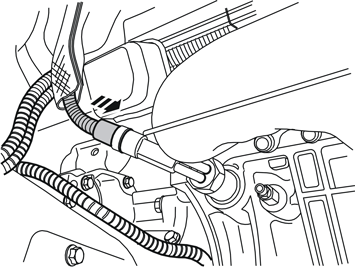
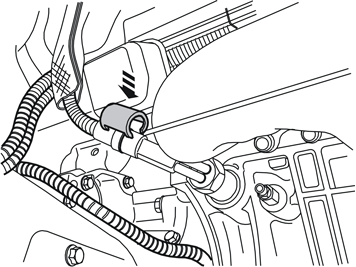
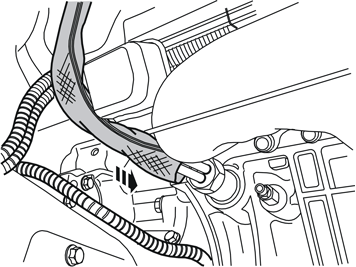
| | Press the joint cable into the clips. Take the radiation shield from the kit and pull it on the end of the cable. Guide the cable down to the location where the engine block heater was installed.
|
|  | | D3601932 |
|
| | |
|  | | R3603704 |
|
| | |
|  | | R3603705 |
|
| | |
|  | | R3603706 |
|
| | |
|  | | R3603717 |
|
| | |
|  | | R3602939 |
|
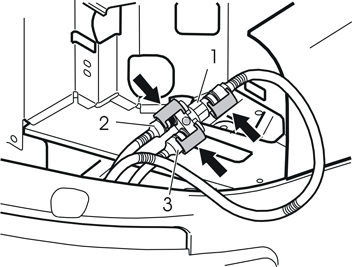
| | Applies when fitting passenger compartment connector at the same time If the car is equipped with passenger compartment connector then the branch connector is to be installed now. Route the cable up from the front engine block heater through the hole in the body, up to the underside of the plate under the headlamp. Connect: socket (1) in branch connector to the cable for the front socket. sockets (2, 3) in the branch connector to any of the cables for the engine block heater and branch connector.
|
|  | | R3603712 |
|
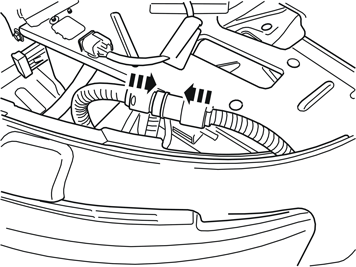
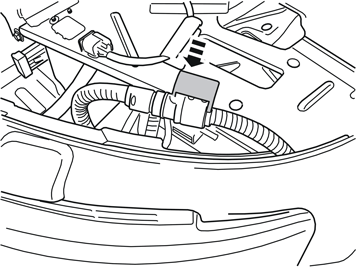
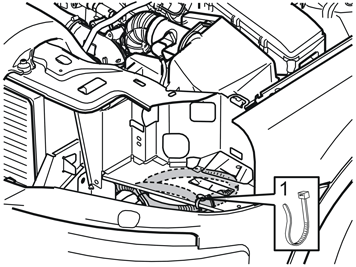
| | Route the cable up from the front engine block heater through the hole in the body, up to the underside of the plate under the headlamp. Firmly press the front socket cable connector into the into the joint cable connector.
|
|  | | R3603710 |
|
| | |
|  | | R3603711 |
|
| | |
| | |
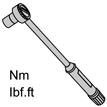
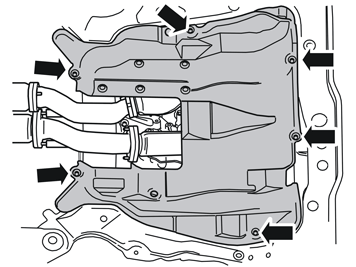
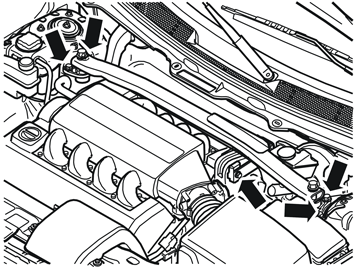
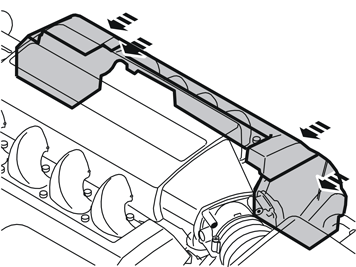
| | Finishing work Connect and reinstall the left-hand headlamp. Reinstall the engine's rear protective cover. Reinstall the strut between the spring strut turrets. Torque tighten the four M10 screws to 50 Nm (37 lbf.ft.) and the M12 screw to 80 Nm (59 lbf.ft.). Make sure that all sealing surfaces are thoroughly cleaned and reinstall the exhaust manifold with new gaskets and clamp nuts from the kit. Torque tighten to 25 Nm (18.5 lbf.ft.). Clamp the pipe above the bracket into its clips. Align the clips for the heat deflector plate's mounting in the bracket for the exhaust manifold's mounting. Tighten the bracket for the exhaust manifold's mounting to 25 Nm (18.5 lbf.ft.). Fill with coolant, drive to normal operating temperature and bleed the system. Check that there are no leaks. Top up with coolant as required. Reinstall the engine splash guard and torque tighten the screws to 25 Nm (18.5 lbf.ft.).
For cars with fuel-driven parking heater installed. Rivet the wing liner to the bumper shell.
|


