| | |
|  | | A8800136 |
|
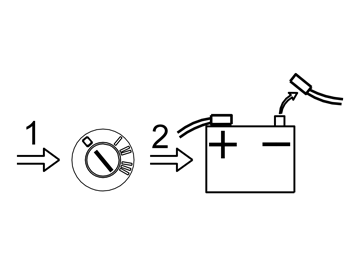
| | Preparations Note!
Wait at least five minutes before disassembling the connectors or removing other electrical equipment. |
|
|  | | IMG-237620 |
|
| | |
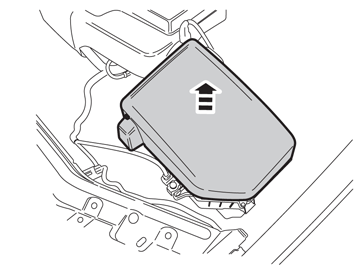
|  | | IMG-237621 |
|
| | |
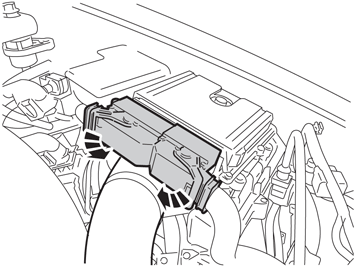
|  | | IMG-237622 |
|
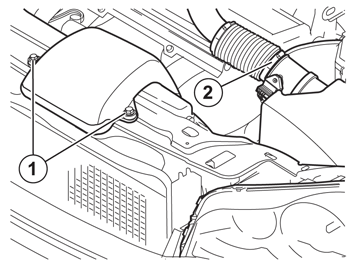
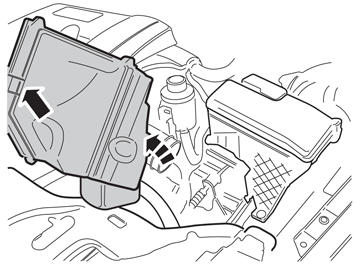
| | Remove the two screws (1) from the induction pipe of the air filter. Detach the hose clamp (2). Remove the intake manifold from the air cleaner (ACL) and place it to one side.
|
|  | | IMG-237623 |
|
| | |
|  | | R3501343 |
|
| | |
|  | | R3501493 |
|
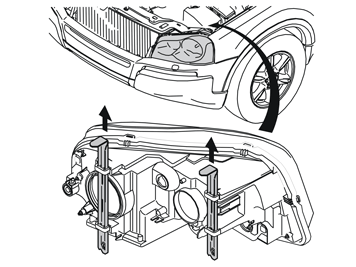
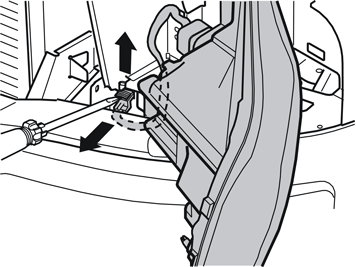
| | Carefully prize up the catch on the connector for the headlamp using a screwdriver. Pull the catch up completely, detach the connector and place the headlamp to one side.
|
| | Installing the auxiliary lights bracket |
|  | | R8600943 |
|
|  | | IMG-237624 |
|
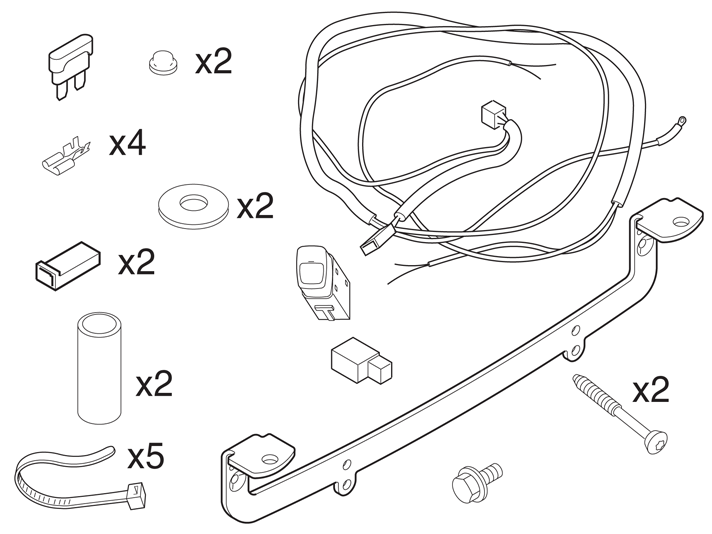
| | Installing the auxiliary lights bracket Illustration A Take the cable harness from the kit and position it with relay and relay holder where the air cleaner (ACL) was located. Route the cable ends without calbe terminal along the left side of the plate flange on the left side member.
Illustration B |
|  | | IMG-237625 |
|
| | |
| | |
|  | | IMG-237626 |
|
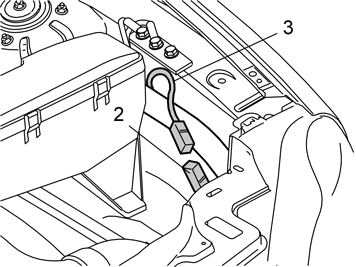
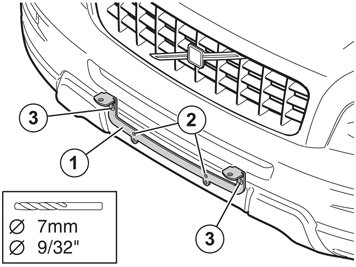
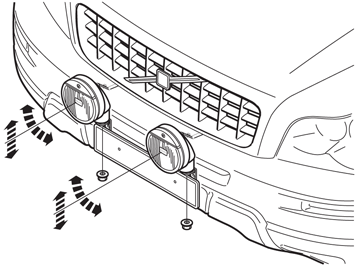
| | Take the auxiliary lights bracket (1) from the kit and secure it in the holes for the number plate holder. Use the upper holes (2) in the auxiliary lights bracket. Drill with a Ø 7 mm (9/32") diameter drill bit in the centre of the holes (3), through the bumper cover and the bumper rail that is 39 mm (1 1/2") inside.
Note!
Keep the drill horizontal. |
Remove the screws and auxiliary lights bracket.
|
|  | | IMG-237627 |
|
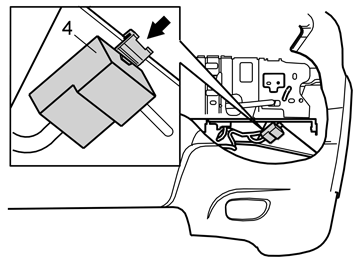
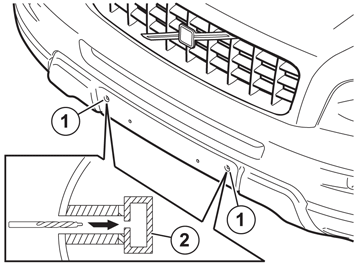
| | Drill the holes (1) with a drill bit (part no. 8633152), through the plastic with the thicker section of the drill bit, and through the bumper rail (2) with the thinner section of the drill bit, which has the dimension Ø7.3 mm (19/64").
Note!
It is important that the tip of the drill bit meets the hole that was previously drilled into the bumper rail. The flat surface on the drill bit must drill out all plastic up to the bumper rail. |
Note!
Hold the drill horizontally. Use a torch to check that there is no plastic swarf in the holes. |
|
|  | | R8600866 |
|
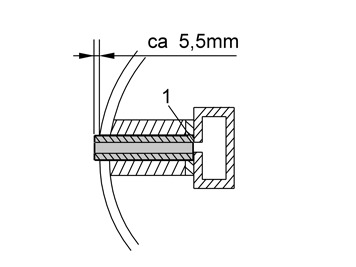
| | Check that the surface (1), which the socket shall support against, is free from plastic. Install two spacer sleeves L=50 mm (2") into the holes.
Note!
The spacer sleeves must protrude approx. 5.5 mm (7/32") from the bumper cover. |
|
|  | | M3501038 |
|
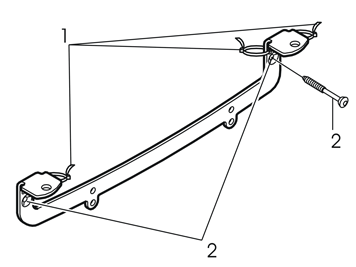
| | Affix tie straps (1) in the holes in the auxiliary lights bracket, but do not tighten. Install the auxiliary lights bracket on the bumper using the screws (2) from the kit. Tighten loosely. The screws create their own threads in the drilled holes, which means that they may screw in stiffly.
|
|  | | IMG-237628 |
|
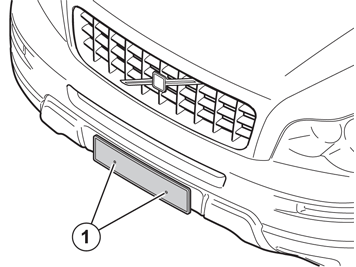
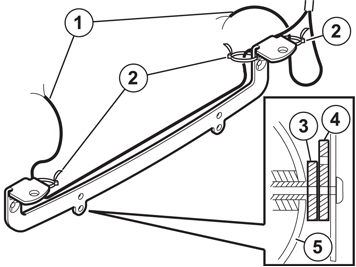
| | Guide in the two cable ends (1) in the three tie straps (2). Route the cables as illustrated. Adapt the length of the cable to the lamps. Press back any excess length of the cable outside of the front grille in through the front grille. Tighten the tie straps. Tighten the two screws for the auxiliary lights bracket. Install a spacer washer (3) between the auxiliary lights bracket (4) and the bumper shell (5) on both sides. Reinstall the number plate holder and fasten it with the two screws. Reinstall the number plate.
|
| | Installing auxiliary lights |
|  | | A3500379 |
|
| | Installing auxiliary lights Note!
Use auxiliary lights which are recommended by Volvo dealers. |
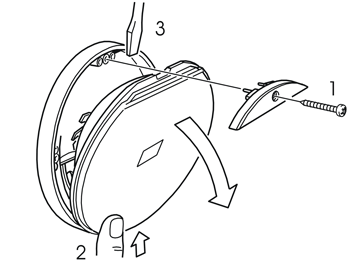
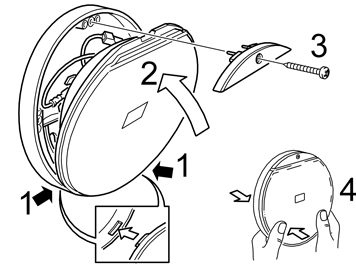
Remove the screw (1) and the cover. Press lightly on the lens (2). Fit a screwdriver (3) between the insert and the lamp housing, and prize carefully.
|
|  | | M3501040 |
|
| | |
|  | | M3501041 |
|
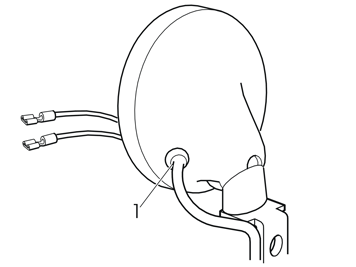
| | Route the cable harness with rubber grommet (1) through the holes in the lamp housing. Press the rubber grommet into the hole. Install the cable terminals from the kit on the two cable ends.
|
|  | | D3500974 |
|
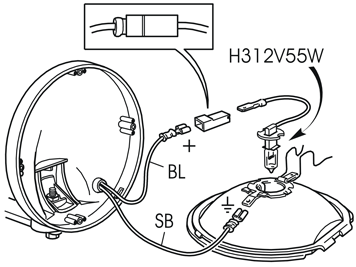
| | Connect the blue (BL) cable to the lamp's cable, with a connector socket housing in between. Connect the black (SB) cable to ground on the light insert.
|
|  | | A3500386 |
|
| | |
| | Cable routing and connection |
| | Cable routing and connection Illustration A Illustration B Illustration C |
|  | | IMG-237633 |
|
|  | | IMG-237634 |
|
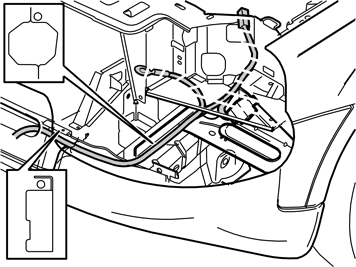
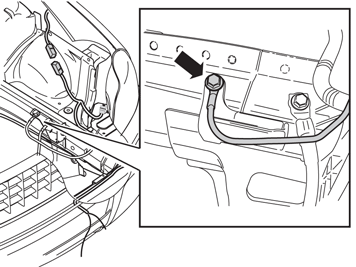
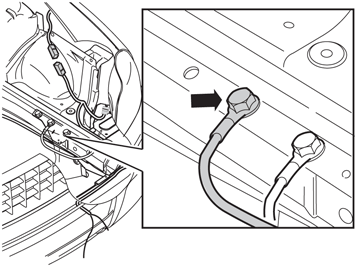
| | Illustration A Applies to cars with 5-cylinder and 8-cylinder engines Slacken the existing screw in the air filter bracket and connect the ground cable - tightening torque: 24 Nm (18 lbf.ft.).
Illustration B Applies to cars with 6-cylinder engine Remove the ground screw from the kit and fasten the ground cable to the centre welding nut - tightening torque: 24 Nm (18 lbf.ft.).
Applies to all models Twist down the ground cable terminal and position the cable so that it is not pinched by the air filter when it is reinstalled. Route any excess cable through the front grille and clamp at existing cables behind the headlamps with tie straps. Reinstall the air filter. Connect and reinstall the control module. Refit the cover over the air filter. Reinstall the intake manifold. Tighten the two screws to 10 Nm (7.5 lbf.ft.). Plug in the connector to the headlamp and reinstall the headlamp.
Note!
The longer of the locking pins must be located on the outside of the headlamp. |
Caution!
Ensure that the cables do not rub and chafe against sharp edges. If the this is the case, rectify this by re-securing the cables. Also check that the cables do not block the air cleaner (ACL) draining hatch. |
|
|  | | IMG-237635 |
|
| | |
| | |
|  | | R8504177 |
|
|  | | R8504178 |
|
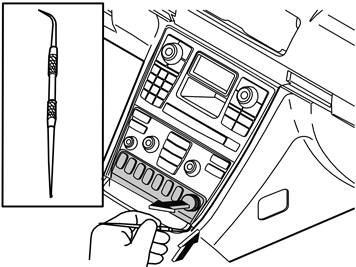
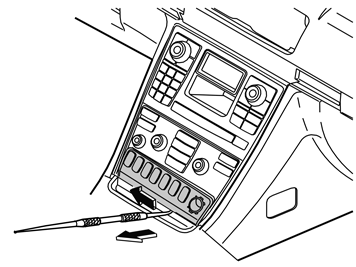
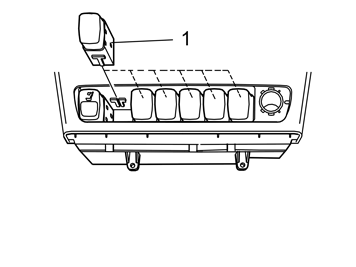
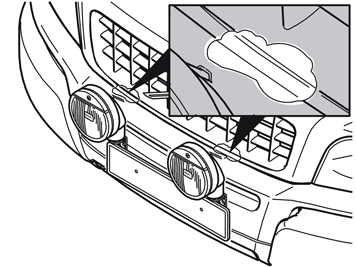
| | Installing the switch Illustration A Remove the cover plug to the 12V socket. Insert a scriber with an angled tip into the joint on the underside, at one side of the keypad surround.
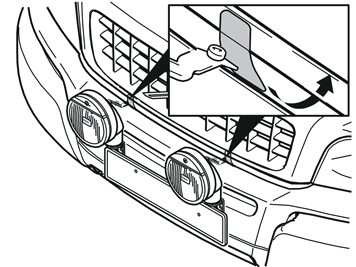
Illustration B Carefully pull out the surround using the scriber, pull along the underside of the surround. It is secured with three mounting lugs in the top and bottom edges.
Note!
Do not damage the surround. |
Place the surround to one side.
Hint
The surround with three button places must be replaced with a surround with seven button places if necessary. This can be purchased separately. |
|
|  | | D8502226 |
|
| | |
| | |
|  | | IMG-237642 |
|
| | Finishing work Turn the ignition key to position II. Reconnect the battery negative lead Align the auxiliary lights for optimum beam pattern. Tighten the two screws. Install the protective caps on the screw heads.
|
| | Installing the top struts |
|  | | R3602955 |
|
| | Installing the top struts Note!
If the auxiliary lights vibrate and this is distracting then a top strut can be installed in accordance with the following steps. |
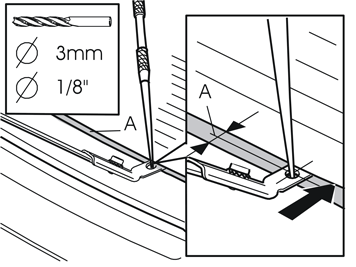
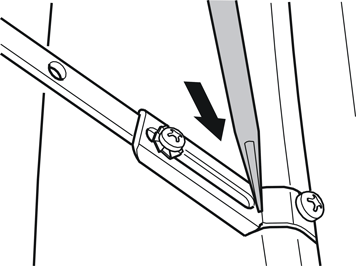
Take the top strut and insert one end in the space between the two bumper sections. Position it in line with the centre of the auxiliary light. Mark out for drilling the hole through the top strut and in the bumper, in the centre of the black edge (A). Drill out the hole using a Ø3 mm (1/8") diameter drill bit. Remove any swarf.
|
|  | | R3602956 |
|
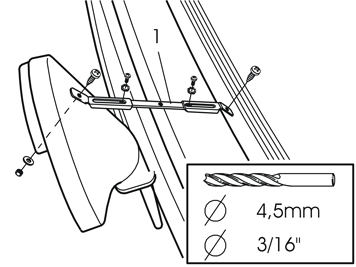
| | Mark out for drilling the hole through the top strut and in the centre top/rear edge of the auxiliary light. Drill out the hole using a Ø 4.5 mm (3/16") diameter drill bit. Remove any swarf. Take the top strut and locate it between both of the drilled holes for cutting the strut (1). Shorten the strut (1) to a suitable length. Tighten the top strut to the bumper and auxiliary light with screws, nuts and toothed washers.
Note!
The toothed washer must not be fitted on the screw to the bumper, as there is otherwise a risk that the screw may chafe against the bonnet's paintwork. |
|
|  | | R3501509 |
|
| | |
|  | | R3501555 |
|
| | |
|  | | R3501556 |
|
| | |