2008 L.H.D

Installation Instruction

Installation instructions, accessories
Volvo Car Corporation Gothenburg, Sweden
V70 2008
V70 (08-) 2008

Instruction NoVersionPart. No.Click to download PDF-version of this Installation Instruction
312858471.330763394
Sill molding, illuminated, front


IMG-266944


Equipment
A0000162
IMG-327738
IMG-239664
IMG-239660
IMG-239663
A0000177
A0000214
M0000232

IMG-327128

IMG-213320


INTRODUCTION

  • Read through all of the instructions before starting installation.

  • Notifications and warning texts are for your safety and to minimise the risk of something breaking during installation.

  • Ensure that all tools stated in the instructions are available before starting installation.

  • Certain steps in the instructions are only presented in the form of images. Explanatory text is also given for more complicated steps.

  • In the event of any problems with the instructions or the accessory, contact your local Volvo dealer.


Preparations

1
IMG-246024
 

Preparations

Applies to all models

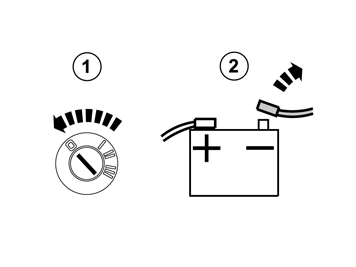
  • Turn the ignition key to position 0.

  • Disconnect the battery negative lead.


Note!

Wait at least three minutes before unplugging the connectors or removing other electrical equipment.


2
IMG-217765
 

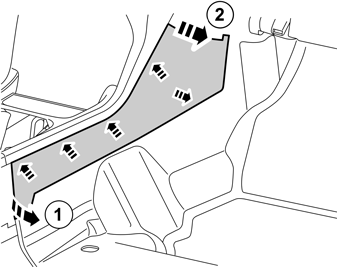
  • Remove the tunnel console's side panel on both sides by carefully pulling it away starting at the rear edge. The panel is secured with five clips on the inside.

  • If the vehicle is equipped with a passenger compartment connector, this must also be removed.

3A
IMG-222268
3B
IMG-222270
 

Only applies to left-hand drive cars

Illustration A

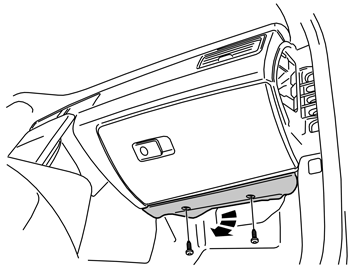
  • Remove the bolts of the panel underneath the glovebox and remove it.

Illustration B

  • Unplug the lighting connector and move the panel aside.

4
IMG-222265
 

Applies to all models

  • Remove the dashboard's end panel on both sides.

5
IMG-231432
 

  • Remove the sill panel in both front doors by first carefully prising loose the front edge and then pulling up until the three clips release. Then pull forwards/upwards.

6
IMG-222267
 

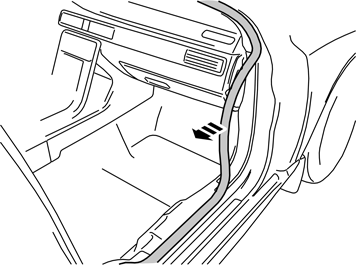
  • Detach the rubber strip at the front edge of the door opening by the lower A-pillar panel on both sides.

7
IMG-231433
 

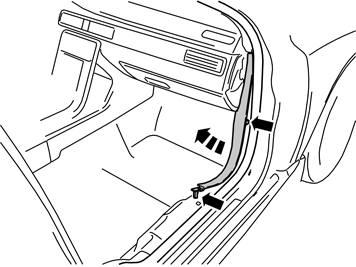
  • Remove the lower A-pillar panel at both front doors by first pulling up at the rear edge until the clip releases. Then pull rearward until the centre clip releases. Finally, pull it off at a downward angle from the upper A-pillar panel.

8
M8401168
 

  • Wash the door sill where the new sill trim is to be installed.

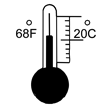
  • Warm up the sill trim using a hot air gun to approximately 60°C (140°F). At the same time pry the sill trim off using a weatherstrip tool. Take care not to damage the painted surfaces. Place the sill trim to one side. New sill trims are supplied in the kit.

  • Repeat the operation on the other front door.

9
M8401169
 

  • Warm up and remove remaining pieces of tape.

  • Repeat the operation on the other front door.

 
10
IMG-266993
 

  • Remove the screw for the bonnet release and pull it out.

11
IMG-266994
 

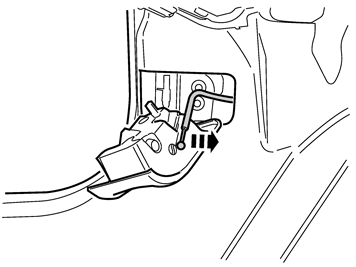
  • Disconnect the cable from the bonnet release.

12
IMG-298164
 

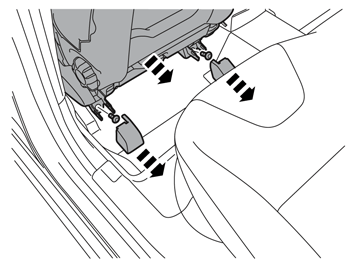
  • Pry off the covers over the driver's seat's attachments and remove the screws.

13
IMG-298165
 

  • Carefully bend off the covers in the driver seat's rear attachments with a weatherstrip tool.

  • Remove the screws.

  • Move back the seat slightly to expose the front floor mat at the trailing edge.

14
IMG-298166
 

  • Lift the driver's seat at the leading edge and pull away the mat.

  • Lift out the mat.

15
IMG-298169
 

  • Fold back the floor mat on the passenger side so that the floor is exposed.

16
IMG-298183
 

  • Loosen the contact bridge on the right door sill's inside and move aside.

  • Remove the blank seal washer on the inside of the right and left door sill.


Note!

Same on left-hand drive and right-hand drive cars.


17
IMG-298203
 

  • Bend a thin welding rod approx. 150 mm (5 7/8") long.

18A
IMG-327143
18B
IMG-327144
 

Illustrations A and B

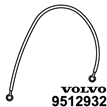
  • Take tension spring tool part no. 9512932 and remove the eyelet.

19
IMG-327145
 

  • Take a thin cable, approximately 500 mm (20") long and insert a little way into the tool.

20
IMG-327146
 

  • Tape the cable at the tool so that it does not slide out.

21
IMG-327148
 

  • Fold the cable back toward the tool and bend the top so that it's profile bends when it is moved backward through the holes in the door sill.

22A
IMG-327149
22B
IMG-327559
 

Illustrations A and B

  • Insert the tool with the cable through the outer hole in the door sill and then through the hole (1) in the intermediate plate in the door sill. Feed in so that the tool passes the round hole (2) in the recess in the door sill.

23A
IMG-327197
23B
IMG-327198
 

Illustrations A and B

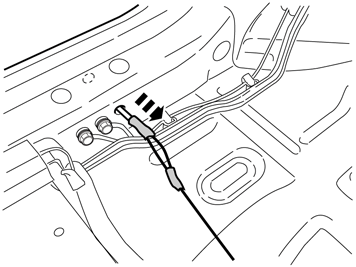
  • Insert the bent wire down through the hole in the door sill and catch the cable/tension spring and pull the cable out through the hole.

24
IMG-327199
 

  • Tape both the cable ends, one at the back at the casing and the cable that is to be used for routing, and the other at the front at the cable that is to be used for routing.

25
IMG-327203
 

  • Now route the cable through carefully.

  • Remove the tape and the cable that is used for routing.

26
IMG-327204
 

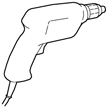
  • Drill out the hole in the blank seal washer using a Ø 6 mm (1/4") drill bit.

27
IMG-327205
 

  • Thread the washer onto the cable and secure over the hole.

28A
IMG-298374
28B
IMG-298375
 

Illustration A

  • Get a loose male connector from the kit and press in the cable terminals on the two cable ends on the sill moulding, cable with red (R) in position 1, the other in position 2, until a click is heard.

Illustration B

  • Press on the white catch inside the connector.

29
IMG-327218
 

  • Clean the marked surface using isopropanol and wipe dry.

30
IMG-327219
 

  • Fold up a section of both pieces of protective tape on top of the moulding.

31
IMG-327220
 

  • Now insert the cable down into the hole in the sill and pull it out the other end.

  • Place the moulding where the old one was and carefully press the rear edge so that it attaches.

  • Pull off the protective tape maintaining the position of the moulding. Press the moulding down after detaching the protective tape.


Note!

Do not press too hard and too close to the protective tape as this risks it coming loose.


32
IMG-327222
 

  • Now remove the final piece of protective tape and repeat the previous point.

33
IMG-327223
 

  • Press the sill moulding down firmly with a pressure of approximately 2 kg/cm² along its length.

  • Repeat steps 21 - 33 on the other side.

34
IMG-267009
 

    The position of the cable harness is the same on left-hand drive cars as on right-hand drive cars.

  • Take the long cable harness from the kit.

  • Insert the longer cable end down through the centre console, along the air ducts and out toward the left-hand front door. Route the shorter cable toward the right-hand door. Route the cable on the right-hand side at the front edge of the floor along the existing cable harnesses as illustrated.

  • Place the green connectors under the glove box or pedal box (applies to right-hand drive cars).

  • Ensure that the protective cover is correctly located where the cable goes through the centre console. Route the cable so that it does not become damaged by moving parts in the centre console.

35A
IMG-327229
35B
IMG-327230
 

Illustration A

  • Get a loose female connector from the kit and press in the cable terminals on the two cable ends on the sill moulding, cable with red (R) marking in position 1 and the other in position 2, until a click is heard.

Illustration B

  • Press on the white catch inside the connector.

36
IMG-327231
 

  • Clean the marked surface in front of the air ducts using isopropanol and wipe dry.

37
IMG-267031
 

  • Remove the protective film from the transformer's attaching tape.

38
IMG-327232
 

  • Press the transformer onto the cleaned surface.

39
IMG-327233
 

  • Connect the connector on the cable from the sill moulding to the corresponding one in the transformer.

40
IMG-327235
 

  • Remove the protective tape from one of the pieces of foam tape from the kit.

41
IMG-327236
 

  • Wrap the joined connectors in the foam tape.

42
IMG-327237
 

  • Connect the remaining connector on the cable to the transformer to the corresponding one in the large cable harness.

43
IMG-327235
 

  • Remove the protective tape from one of the pieces of foam tape from the kit.

44
IMG-327243
 

  • Wrap the joined connectors in the foam tape.

45
IMG-327244
 

  • Distribute the cable excess in long loops at the existing cable harness and clamp it together with the foam tape wrapped connectors using cable ties from the kit.

  • Repeat steps 35 - 45 on the other side.

46A
IMG-267018
46B
IMG-225272
 

Only applies to left-hand drive cars

Illustration A

  • Connect the green male connector for the prerouted cable harness to the courtesy lighting.

  • Connect the remaining green connectors to each other.

Illustration B

  • Reinstall the panel under the glove compartment.

  • Fold back the carpets.

47
IMG-267020
 

Only applies to right-hand drive cars.

  • Disconnect the 2-pin male connector (1) from the courtesy lighting and connect it to the corresponding connector (2) in the prerouted cable harness.

  • Connect the remaining connector (3) to the courtesy lighting.

  • Secure the cable in front of the pedal box by the existing wiring using cable ties from the kit. Ensure that it does not rub against the steering shaft and other moving parts under the dashboard.

48
IMG-298583
 

Applies to all models

49
IMG-298584
 

50
IMG-298586
 

51
IMG-298523
 

52
IMG-298524
 

53
IMG-229222
 

54
IMG-267024
 

55
IMG-267025
 

56
IMG-267026
 

57
IMG-267027
 

58
IMG-267028
 

59
IMG-267029
 

60
IMG-242267
 

  • Turn the ignition key to position II.

  • Reconnect the battery negative lead