2005 D5 AUTOMATIC L.H.D

Monteringsveiledning

Installation instructions, accessories
Volvo Car Corporation Gothenburg, Sweden
V70 2005
V70 (00-08) 2005

Instruction NoVersionPart. No.Click to download PDF-version of this Installation Instruction
306606811.0
Radio HU


Equipment
A0000162
A0801178

M3905104


INTRODUCTION

  • Read through all of the instructions before starting installation.

  • Notifications and warning texts are for your safety and to minimise the risk of something breaking during installation.

  • Ensure that all tools stated in the instructions are available before starting installation.

  • Certain steps in the instructions are only presented in the form of images. Explanatory text is also given for more complicated steps.

  • In the event of any problems with the instructions or the accessory, contact your local Volvo dealer.

 

Note!

This accessory is connected to the electrical system of the car. It requires software unique to the car.


1
A8800136
 

    Applies to cars with automatic gearboxes

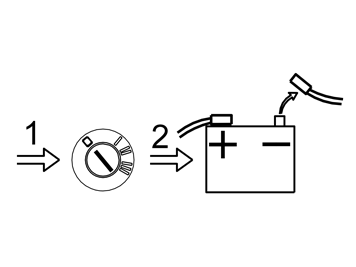
  • Turn the ignition key to position 0.


Note!

Wait at least five minutes before disconnecting the connectors or removing other electrical equipment.


  • Disconnect the battery negative lead.

    Applies to cars with manual gearboxes

  • Turn the ignition key to position 0. Remove the ignition key from the ignition switch.


Note!

Wait at least five minutes before disconnecting the connectors or removing other electrical equipment.


2
M8504991
 

  • Remove the polystyrene block from the centre console. It will not be reused.

3
M8504992
 

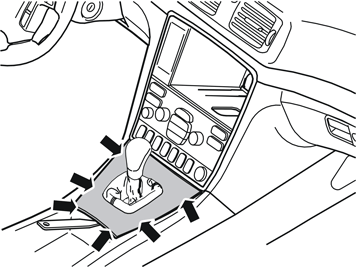
  • Detach the rear edge of the gear selector lever cover together with the boot until the two clips release. Use a plastic weatherstrip tool. Remove the gear selector lever cover and the boot. Pull the panel up until the four clips at the sides release.

4
M8504993
 

  • Apply the handbrake. Move the gear selector backwards

  • Turn the panel to the left to facilitate access

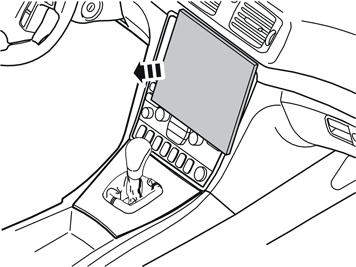
  • Remove the two screws holding the bracket with the radio and the dashboard environment panel in the centre console.

5
M8504994
 

  • Remove the bracket with dashboard environment panel from the centre console: Pull the lower edge out and downwards until it releases from the mounting at the upper edge. Then fold backwards.


Note!

Do not damage the removed components and surrounding panels.


If necessary, remove the panel around the gear selector lever to gain more space. The panel is secured by four catches on the lower side at the boot.

  • Remove the connectors from the dashboard environment panel. Disconnect the connector for the phone if installed.

6
M3905098
 

  • Remove the three screws in the upper edge of the trim for the unit and radio and dashboard environment panel.

7
M3905105
 

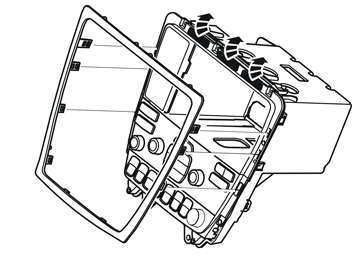
  • Remove the trim from the unit. Pry off the catches along the vertical and lower sides of the trim. Pull off the trim. Do not damage the catches. The catches are thin and easily broken

  • Remove the three pieces of foam tape from the centre console. They will not be reused.

8
M3905106
 

  • Remove the four screws on the reverse of the dashboard environment panel. Remove the dashboard environment panel from the bracket.

9
M3904991
 

  • Take the radio from the kit. Press the radio into place in the bracket. Ensure that all the four catches on the sides engage.

10
M3904990
 

  • Reinstall the dashboard environment panel in the bracket. Use 4 x screws

  • Reinstall the trim around the unit. Use 3 x screws in the upper edge.

11
M3905045
 

  • Reconnect the connector for the phone, if installed

  • Connect the connectors to the dashboard environment panel

  • Connect the two large or single large (depending on version) pre-routed connector(s) to the radio

  • Connect the pre-routed antenna connector to the radio

  • Reinstall the unit in the centre console. Tighten the centre console. Use the two screws

  • Reinstall the panel around the gear selector lever

  • Connect the battery negative lead

  • Program the software according to the service information in VIDA.